-
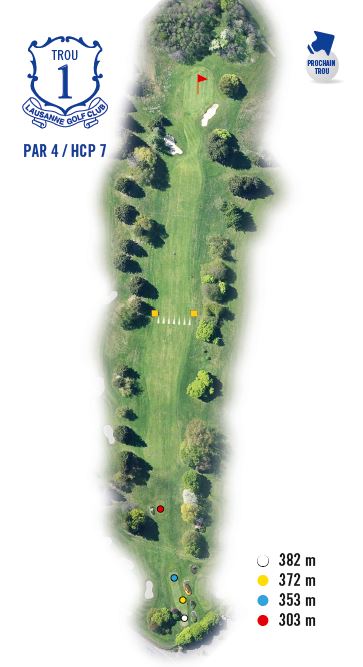

Hole n°1 - Distances
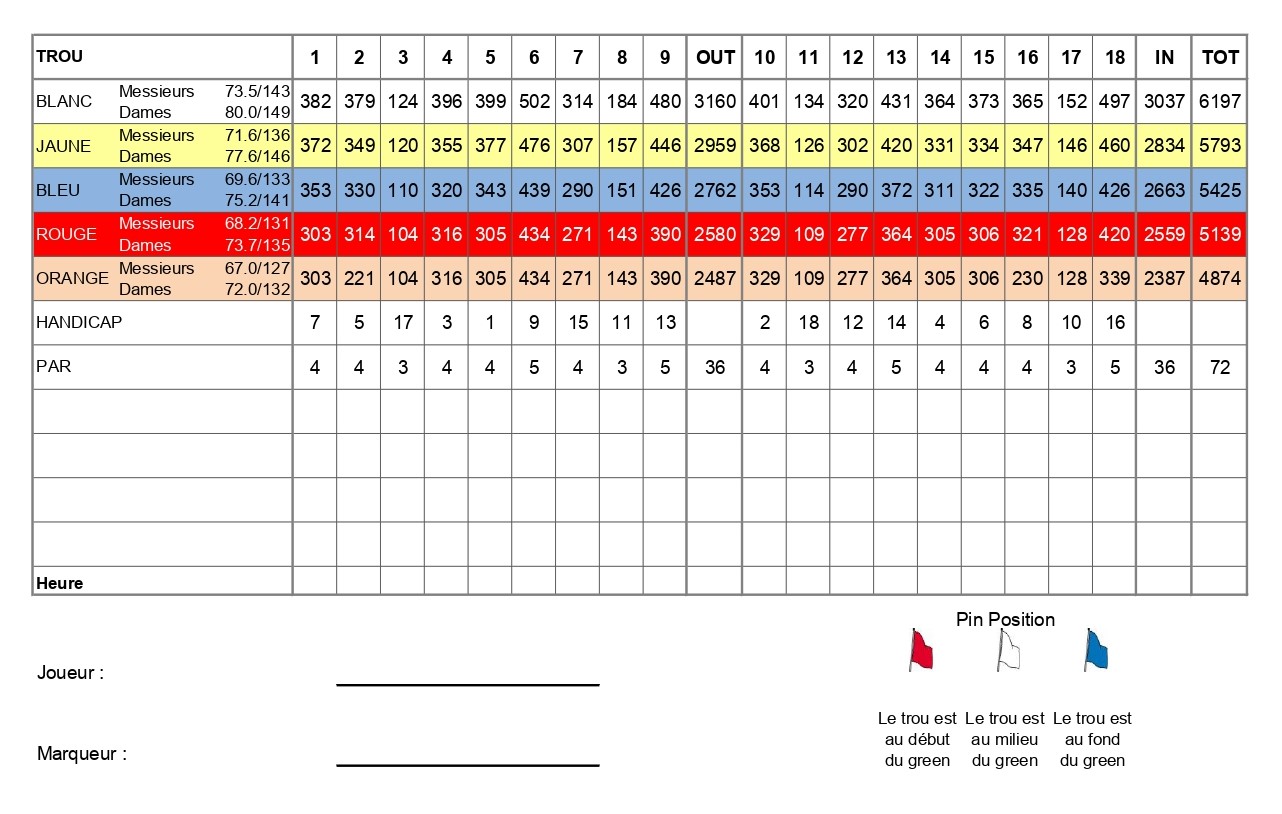
Hole PAR HCP White Yellow Blue Red Orange 1 4 7 382 372 353 303 303 Hole n°1 - Infography
-
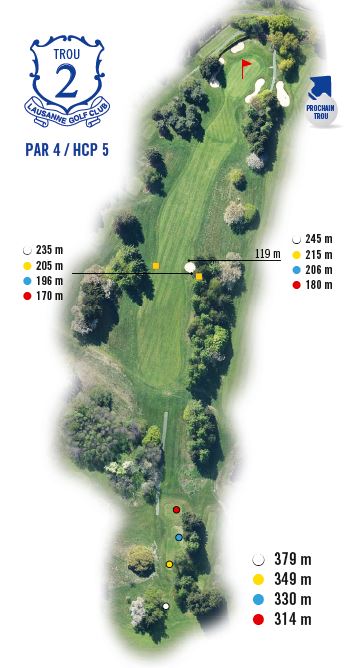
Hole n°2 - Distances
Hole PAR HCP White Yellow Blue Red Orange 2 4 5 379 349 330 314 221 Hole n°2 - Infography
-
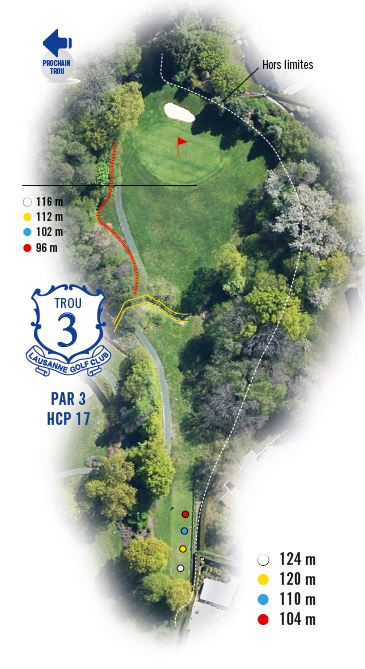
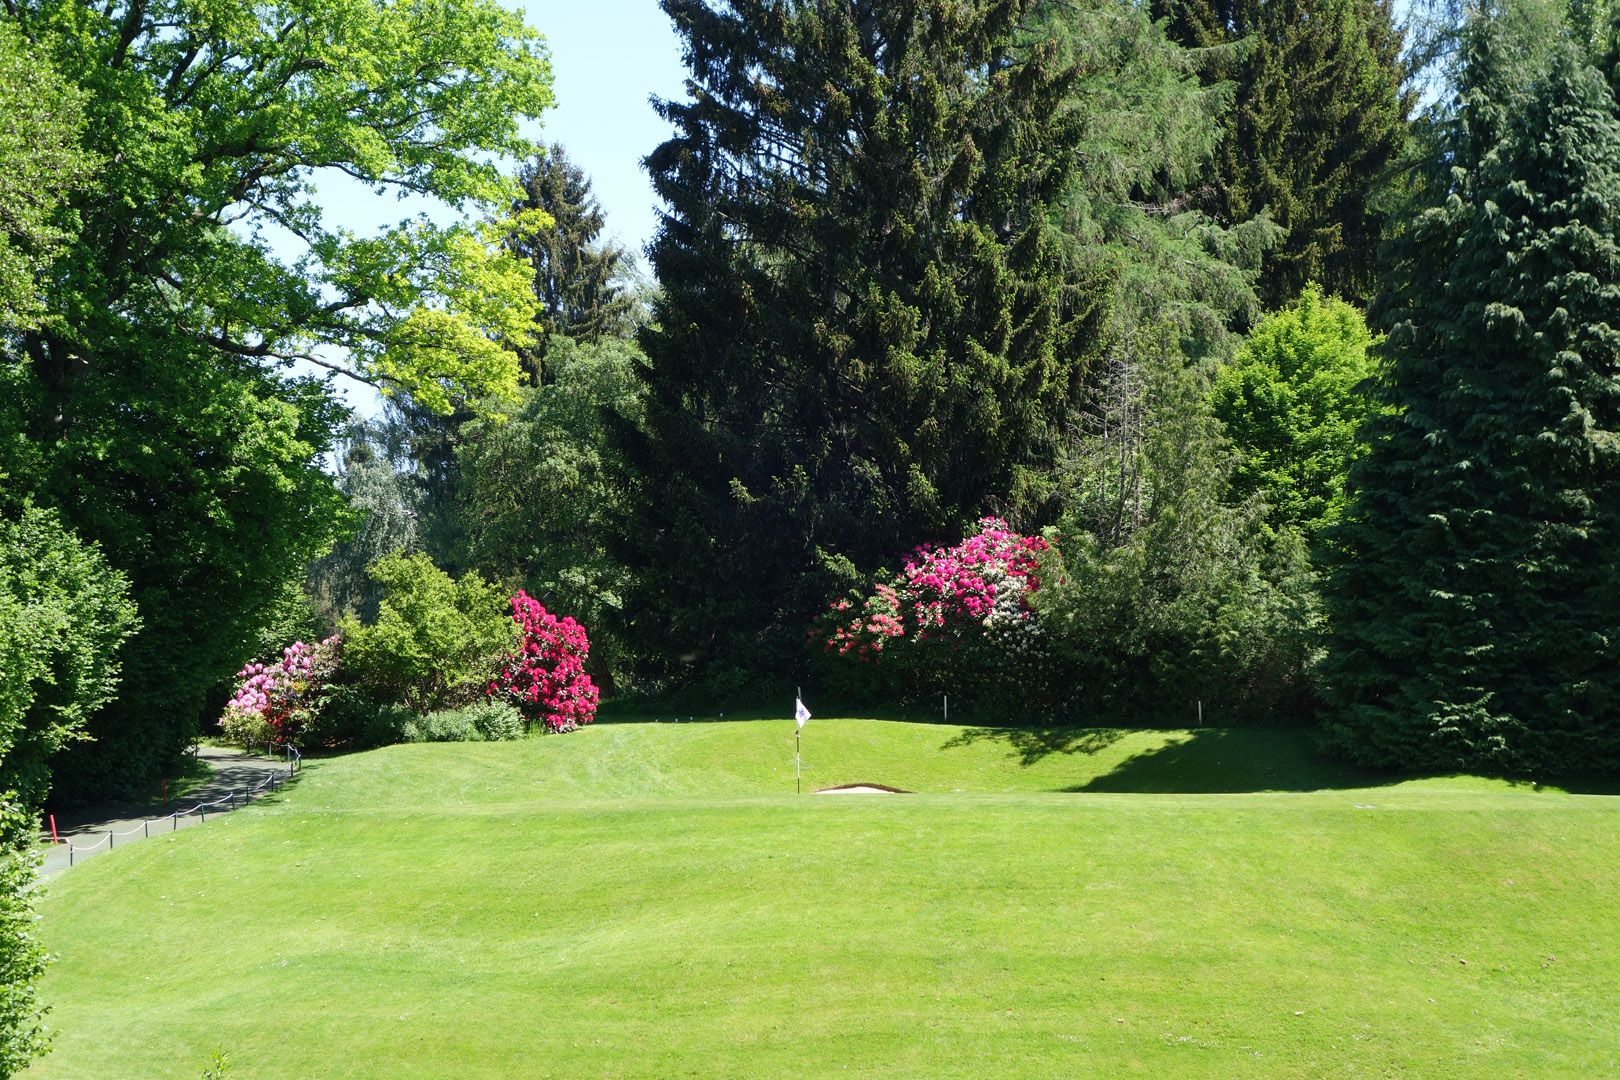
Hole n°3 - Distances
Hole PAR HCP White Yellow Blue Red Orange 3 3 17 124 120 110 104 104 Hole n°3 - Infography
-
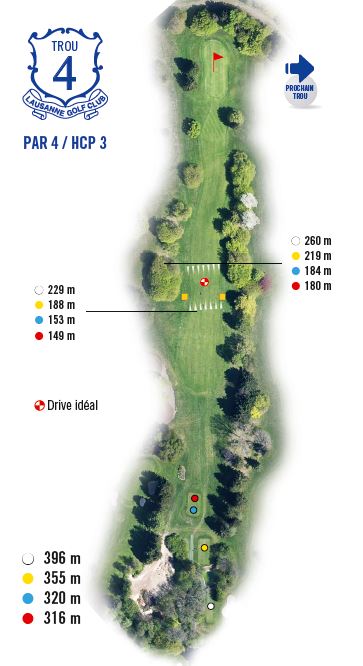
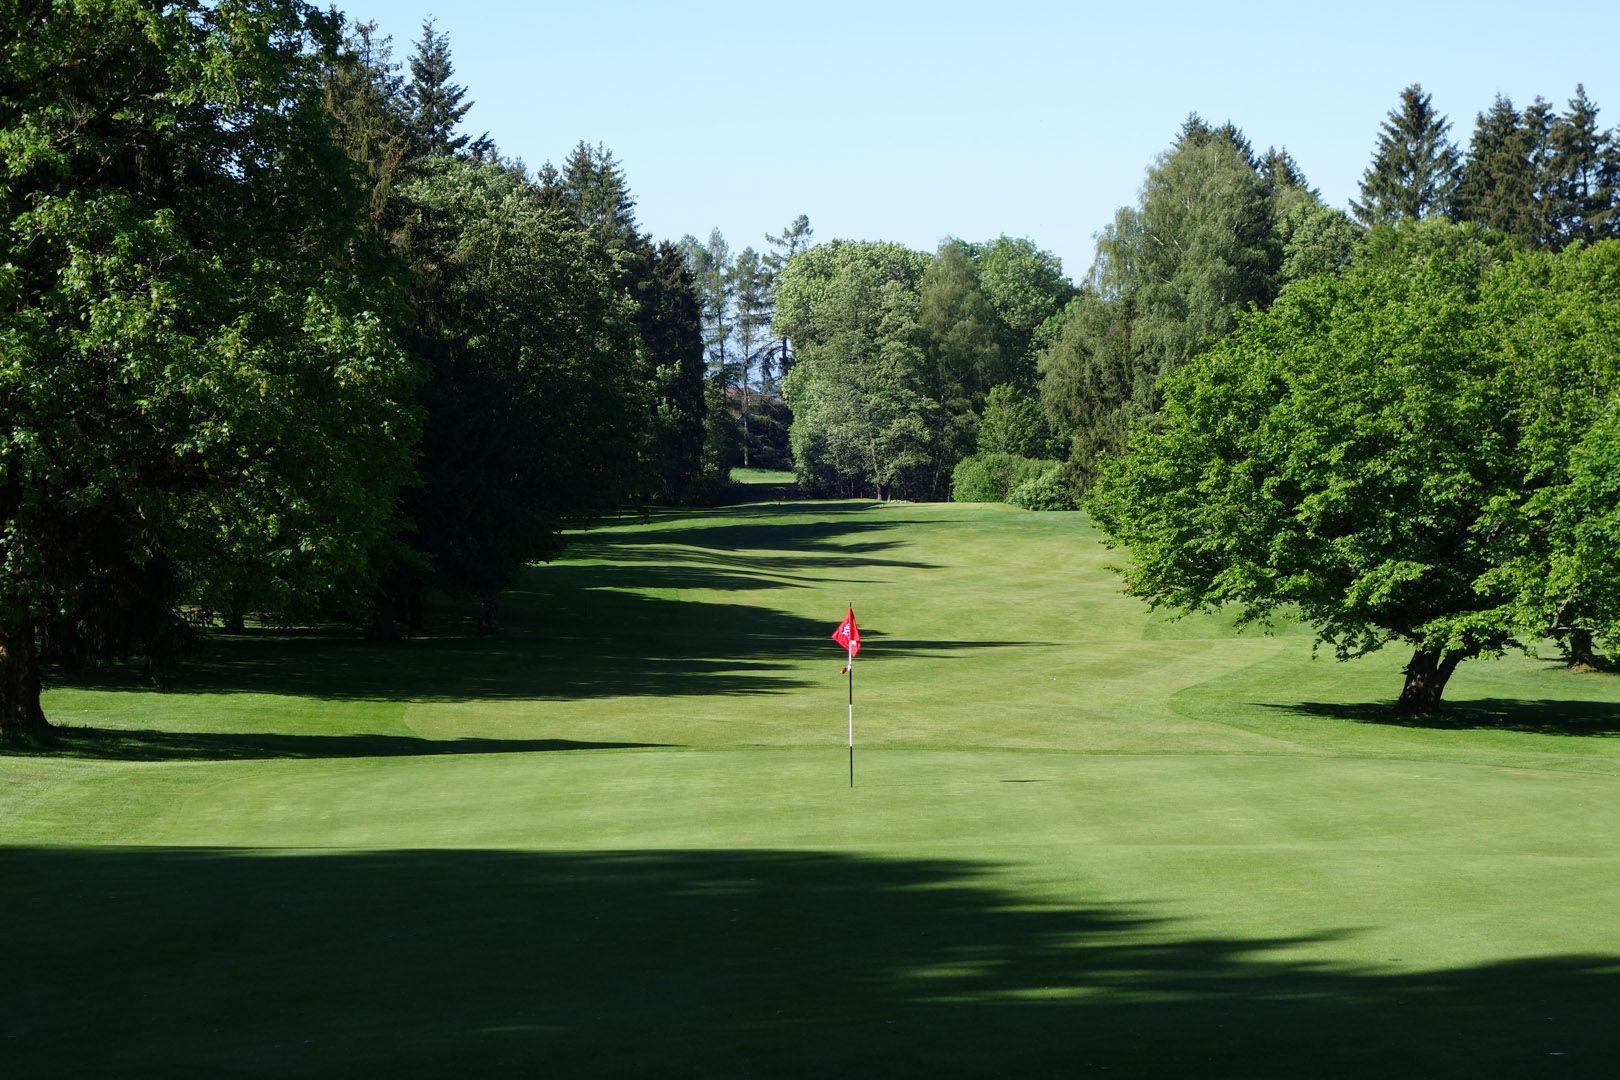
Hole n°4 - Distances
Hole PAR HCP White Yellow Blue Red Orange 4 4 3 396 355 320 316 316 Hole n°4 - Infography
-
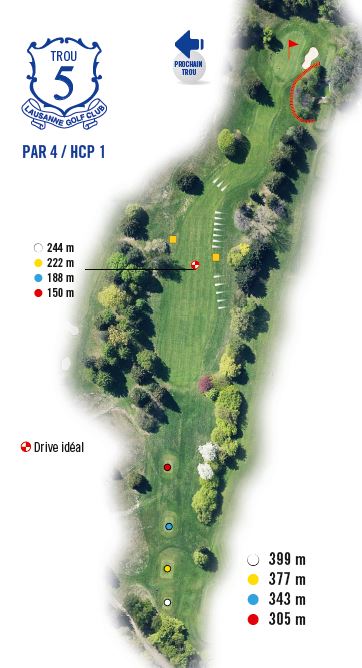
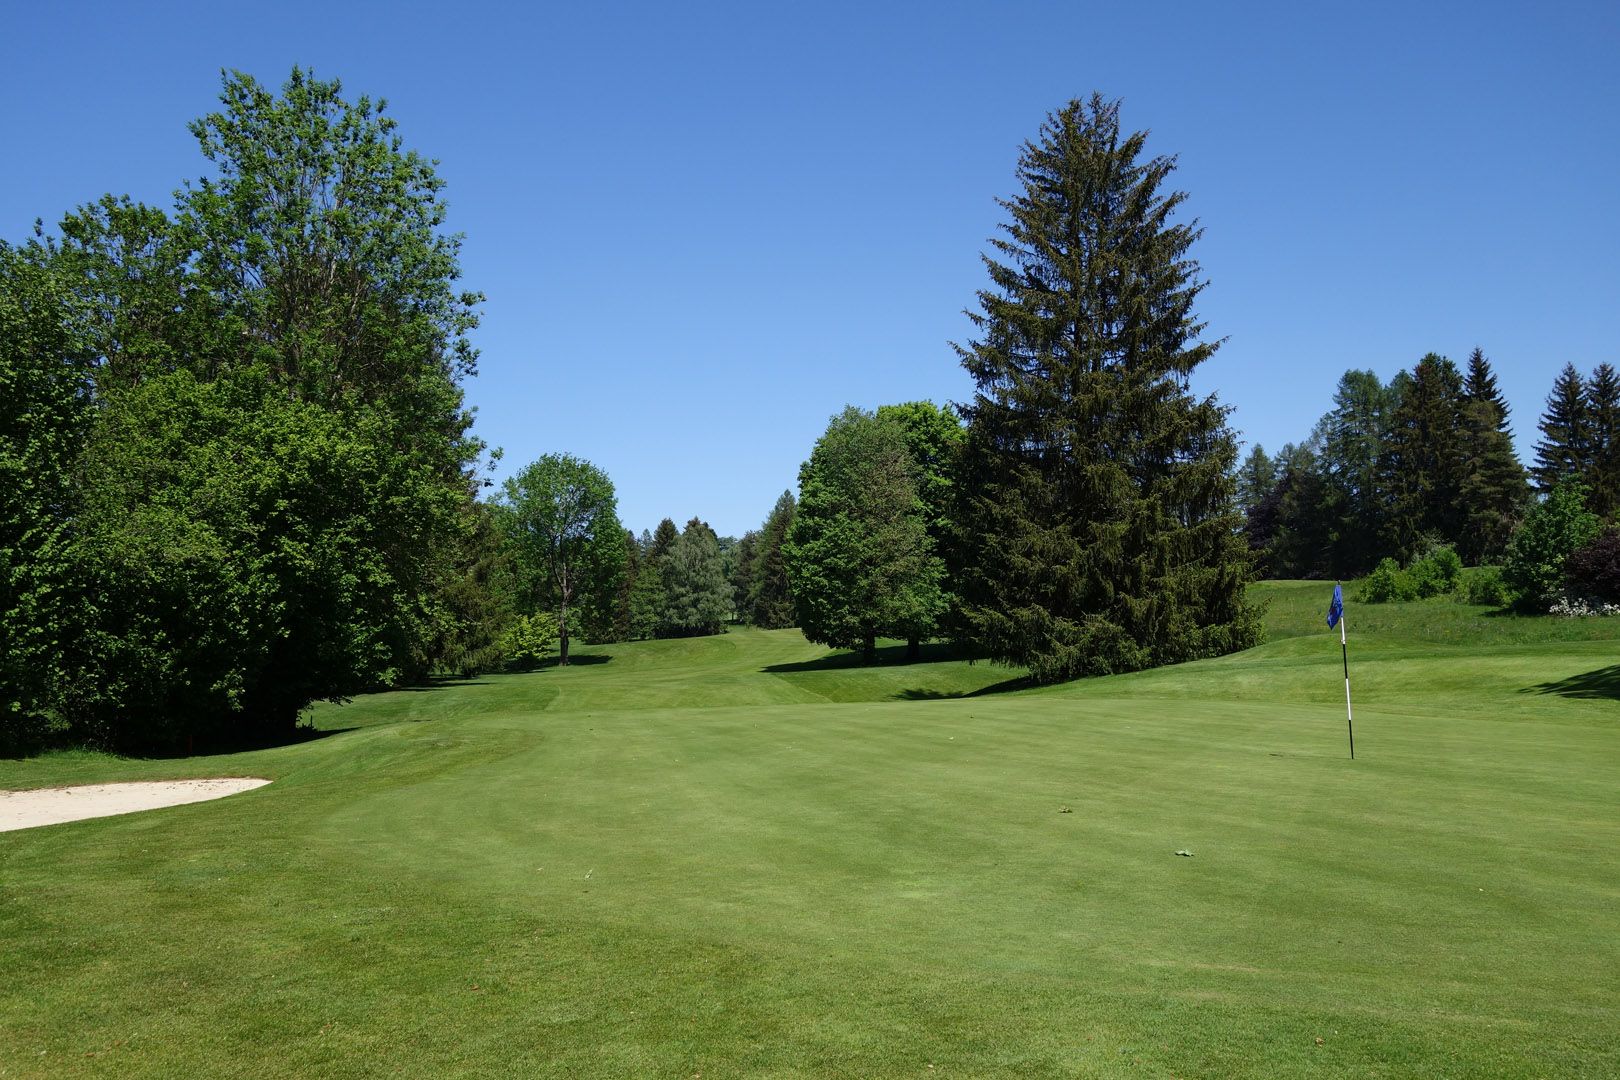
Hole n°5 - Distances
Hole PAR HCP White Yellow Blue Red Orange 5 4 1 399 377 343 305 305 Hole n°5 - Infography
-
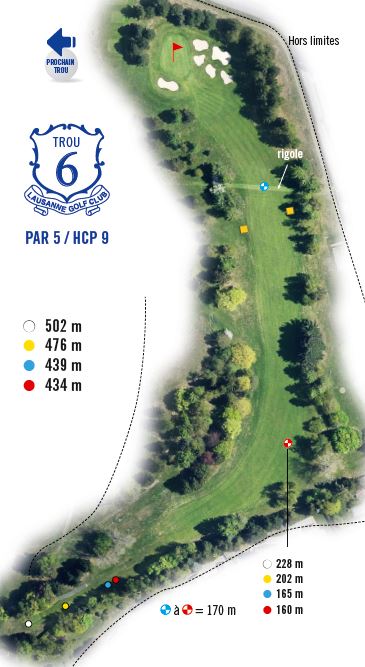
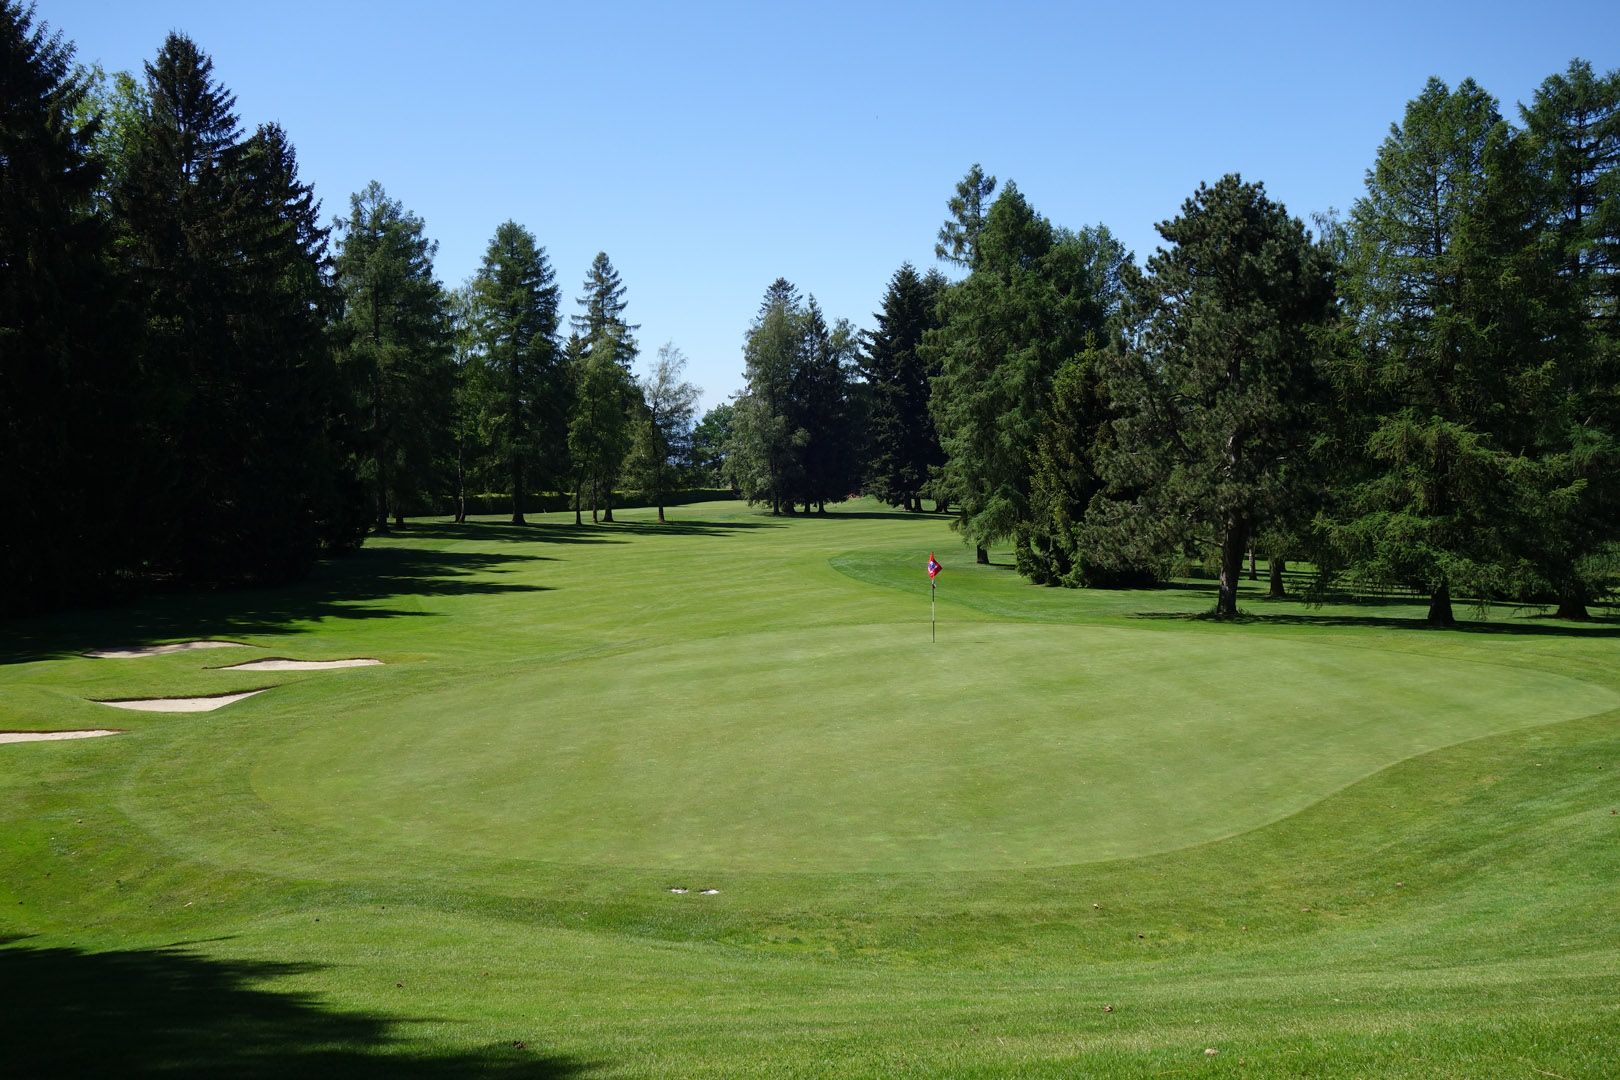
Hole n°6 - Distances
Hole PAR HCP White Yellow Blue Red Orange 6 5 9 502 476 439 434 434 Hole n°6 - Infography
-
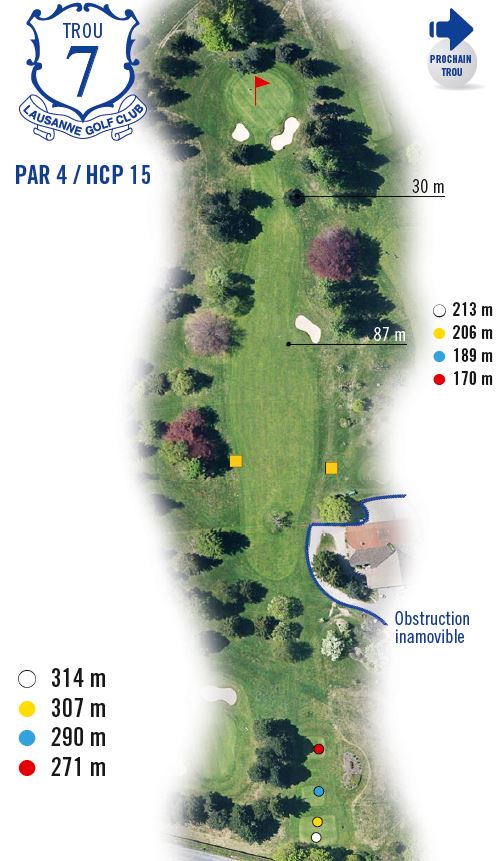
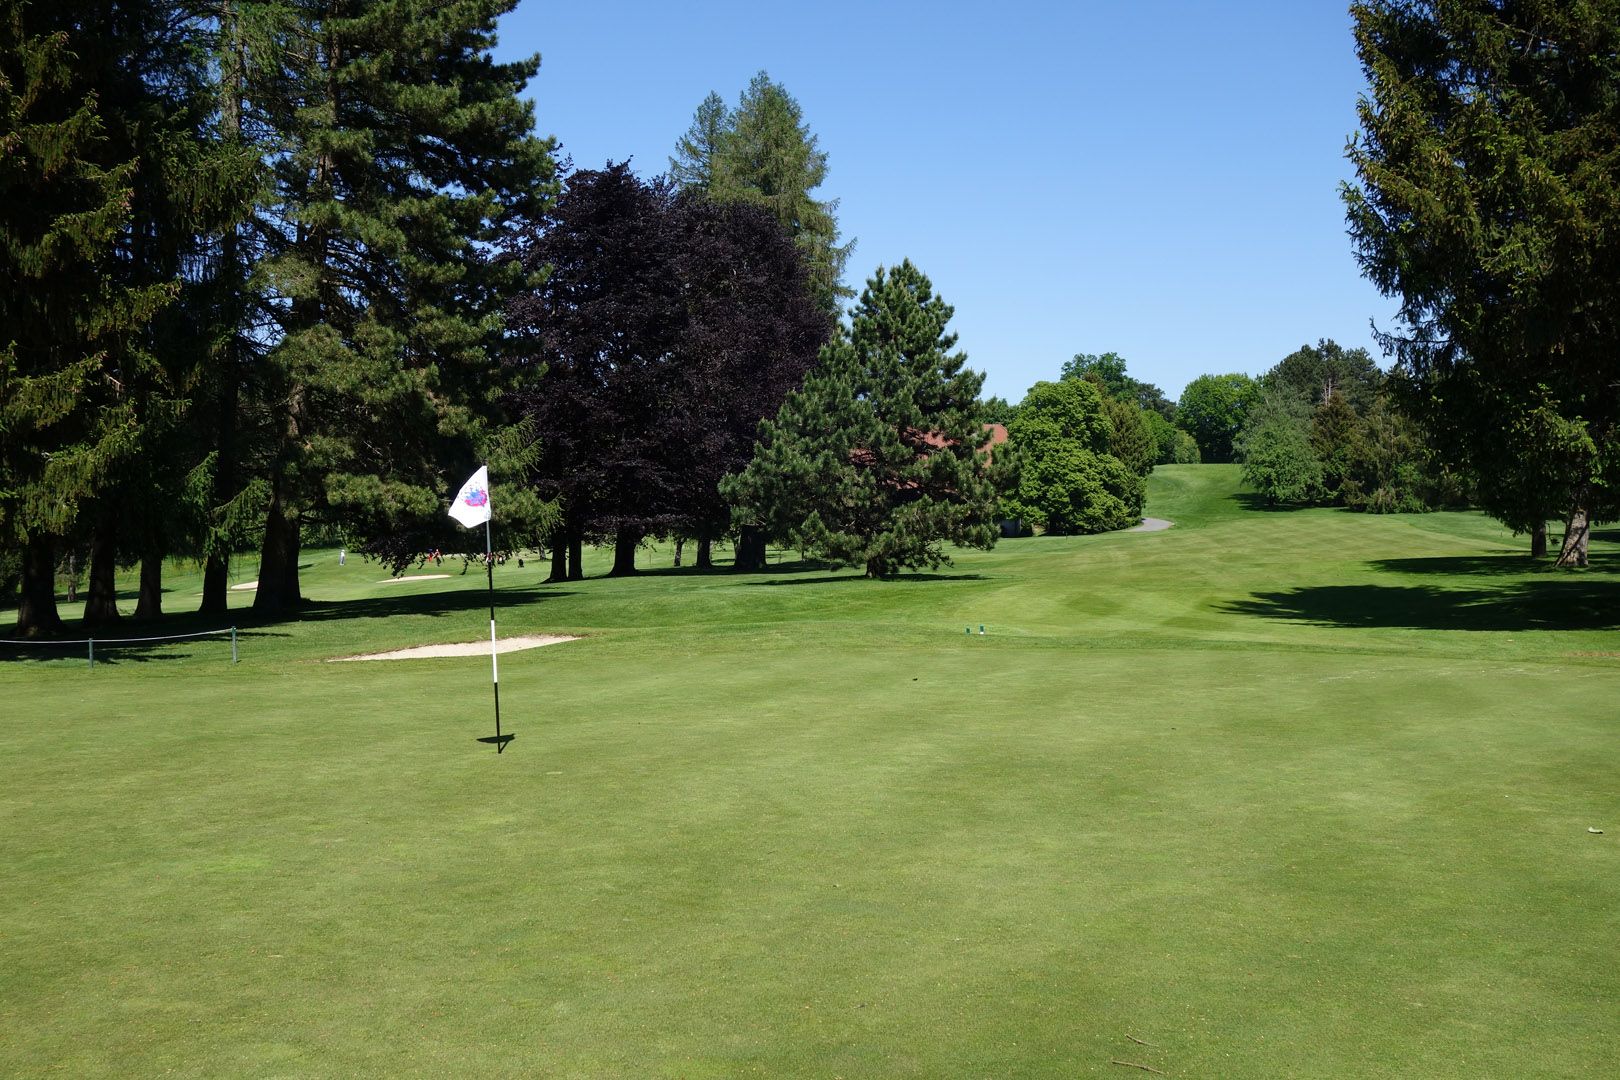
Hole n°7 - Distances
Hole PAR HCP White Yellow Blue Red Orange 7 4 15 314 307 290 271 271 Hole n°7 - Infography
-
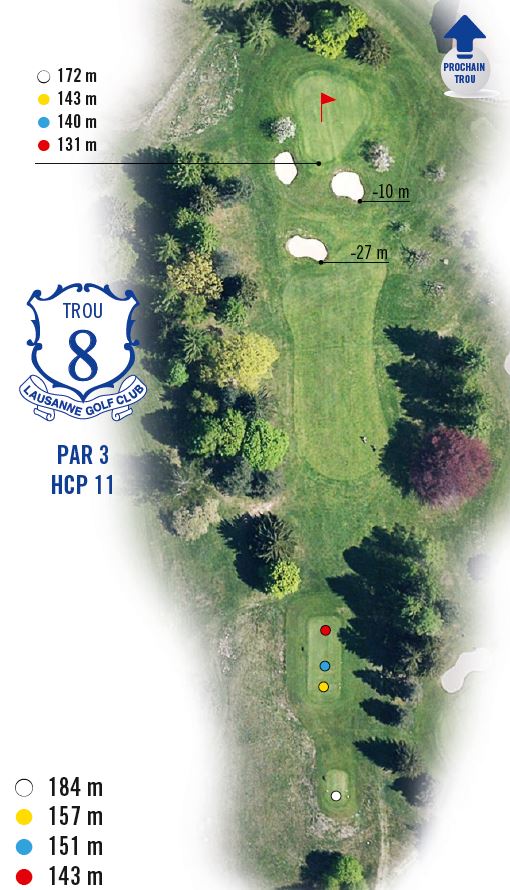
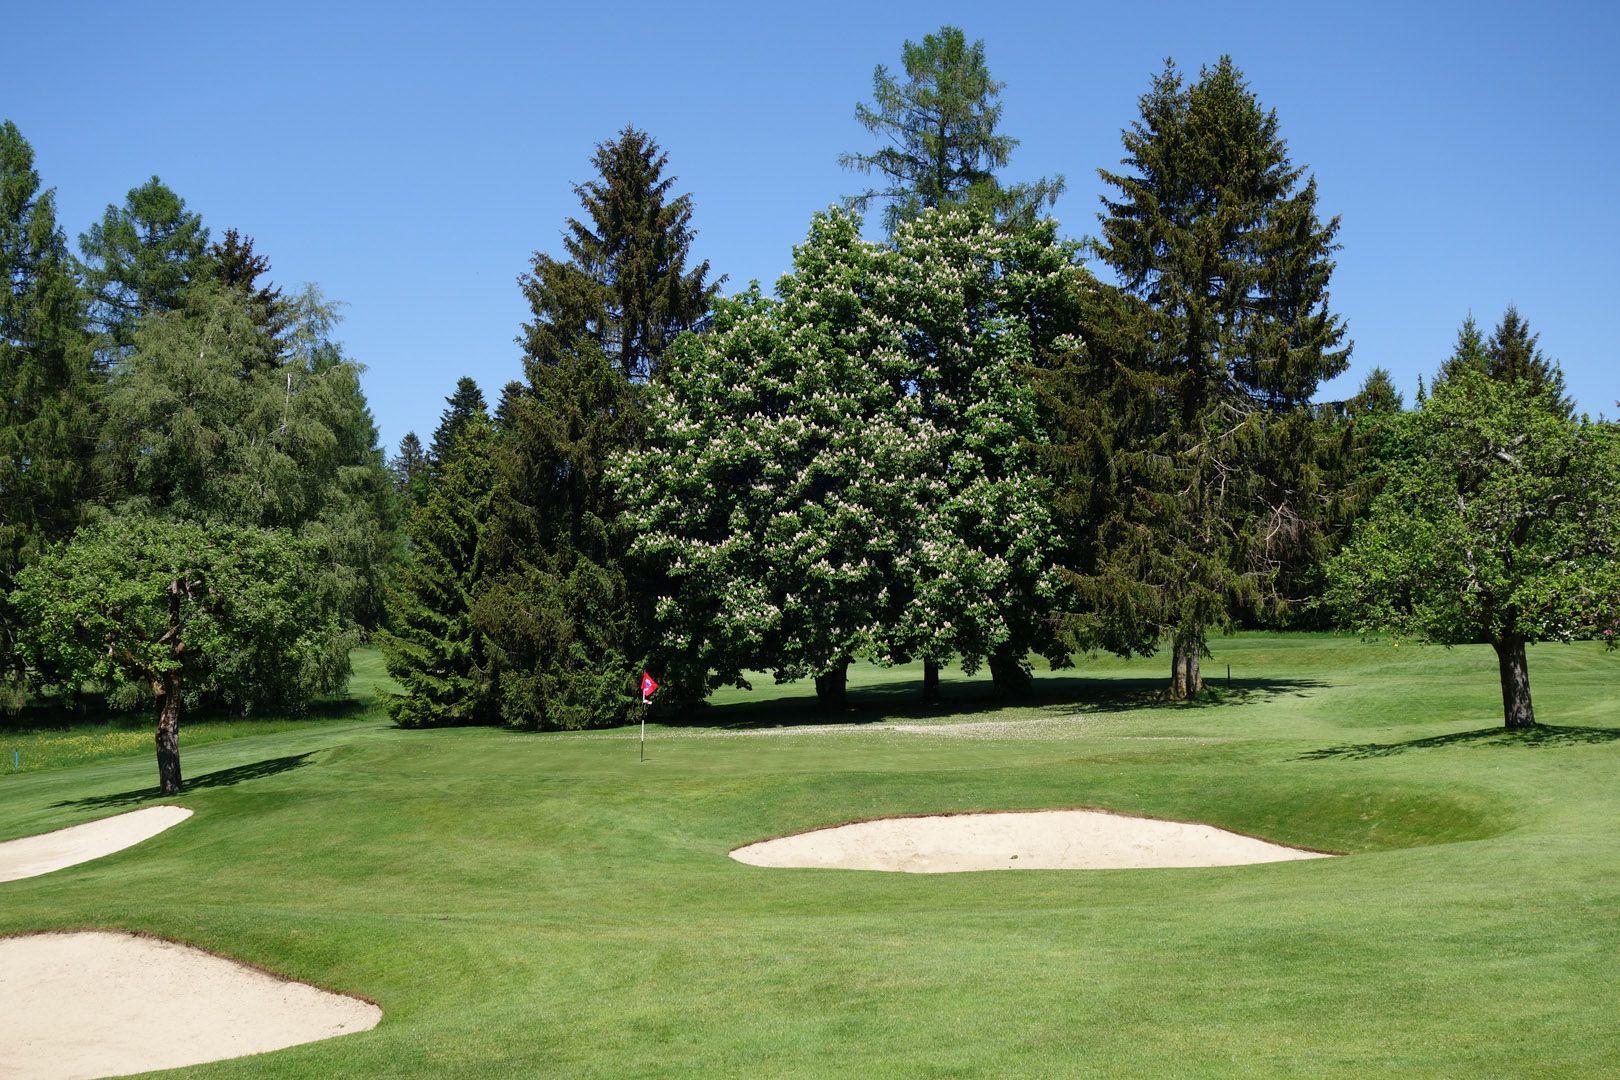
Hole n°8 - Distances
Hole PAR HCP White Yellow Blue Red Orange 8 3 11 184 157 151 143 143 Hole n°8 - Infography
-
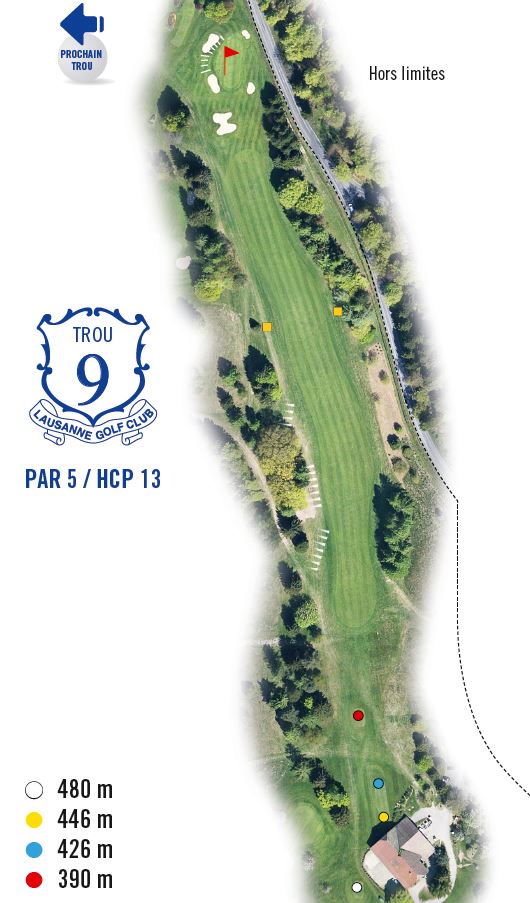
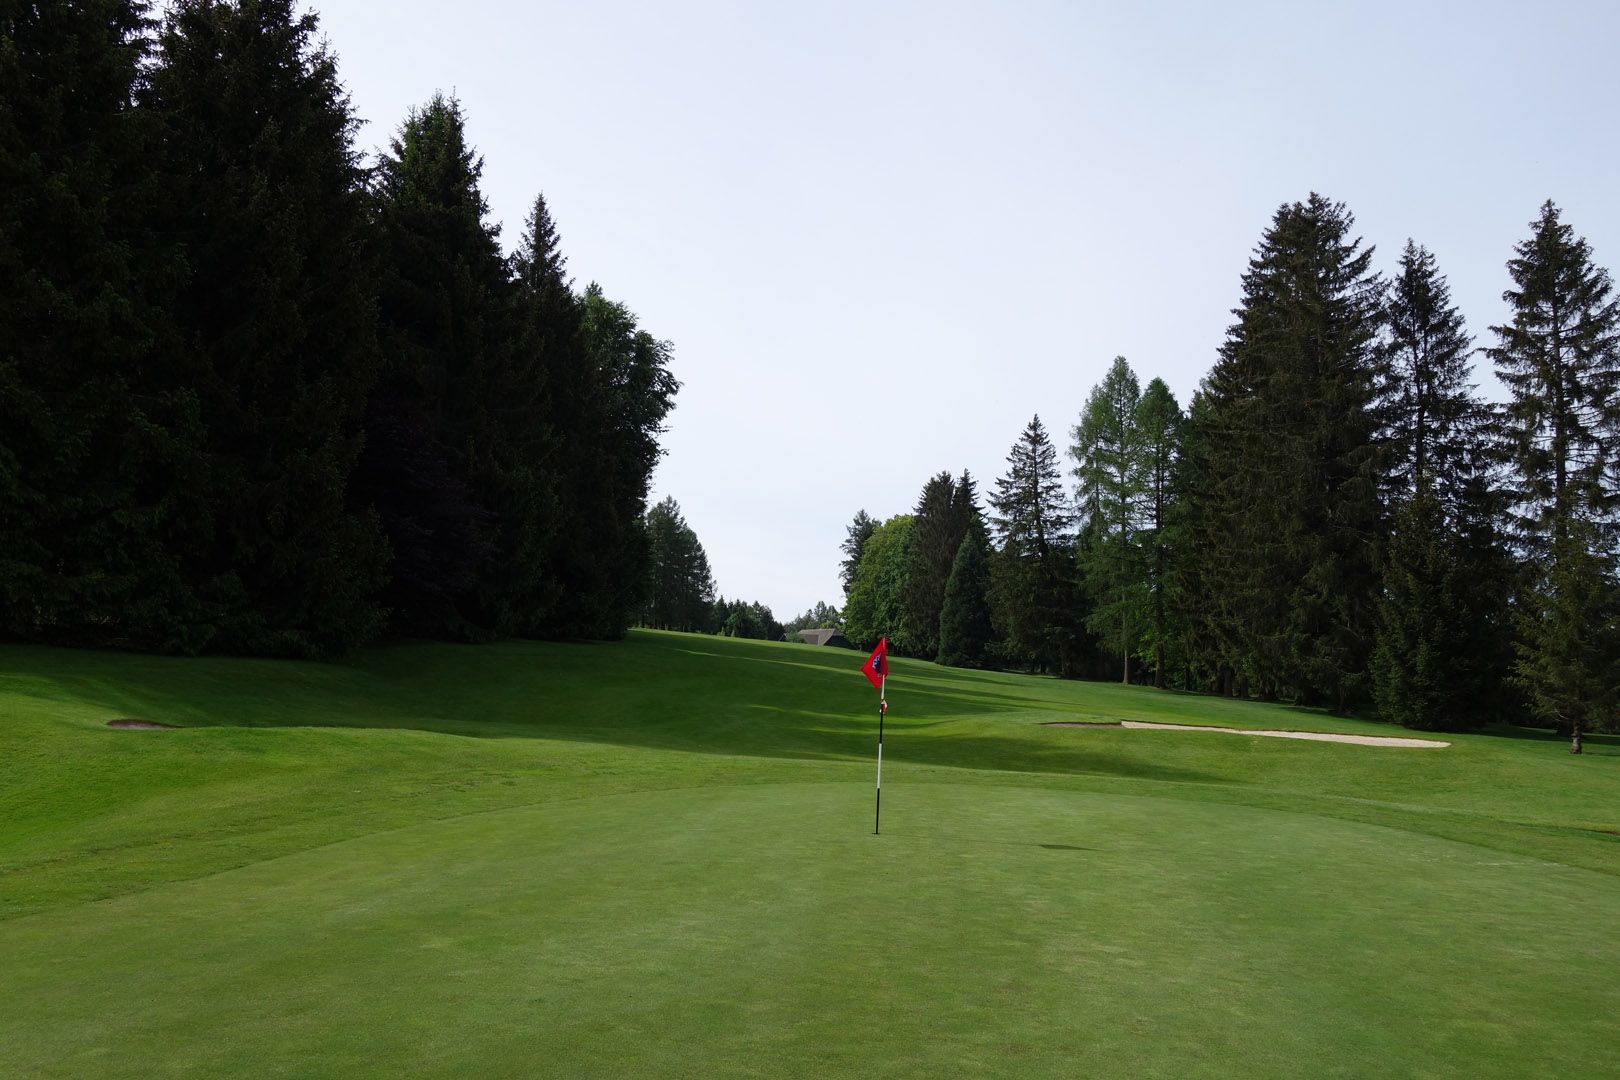
Hole n°9 - Distances
Hole PAR HCP White Yellow Blue Red Orange 9 5 13 480 446 426 390 390 Hole n°9 - Infography
-
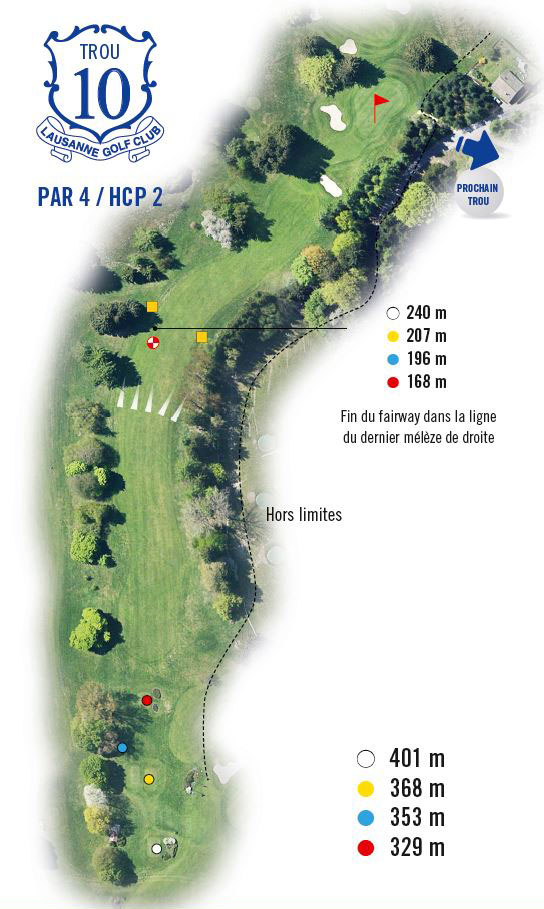
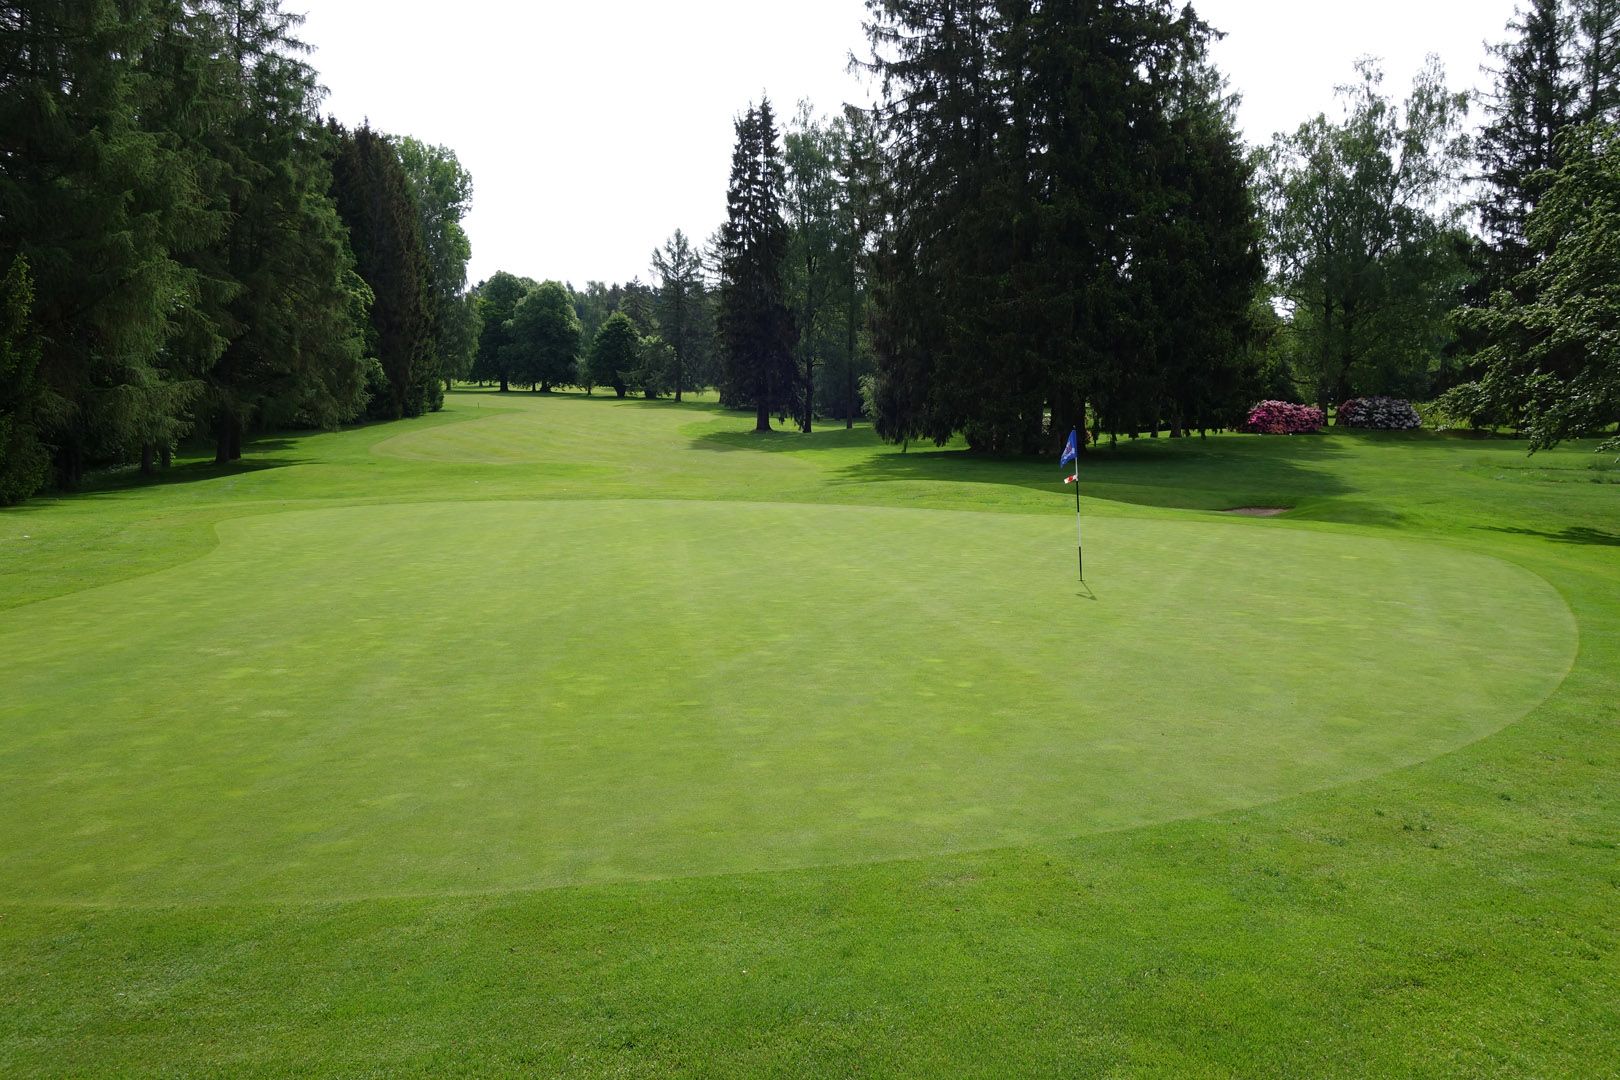
Hole n°10 - Distances
Hole PAR HCP White Yellow Blue Red Orange 10 4 2 401 368 353 329 329 Hole n°10 - Infography
-
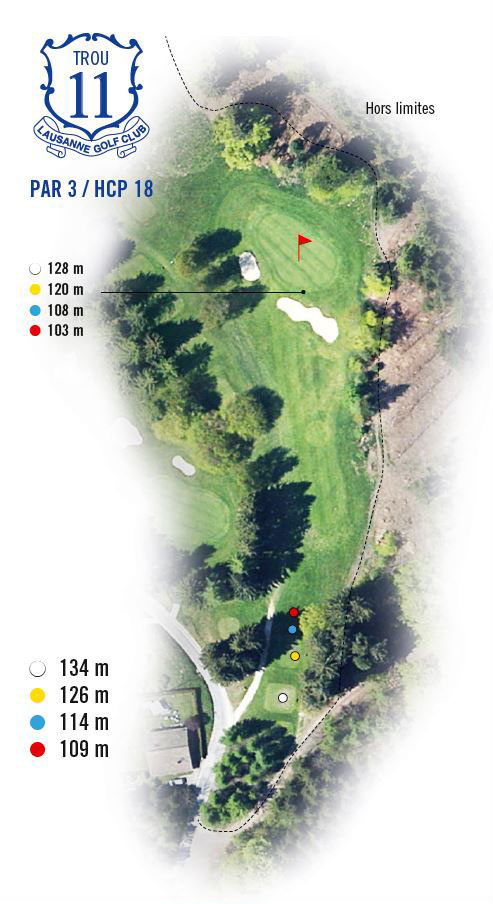
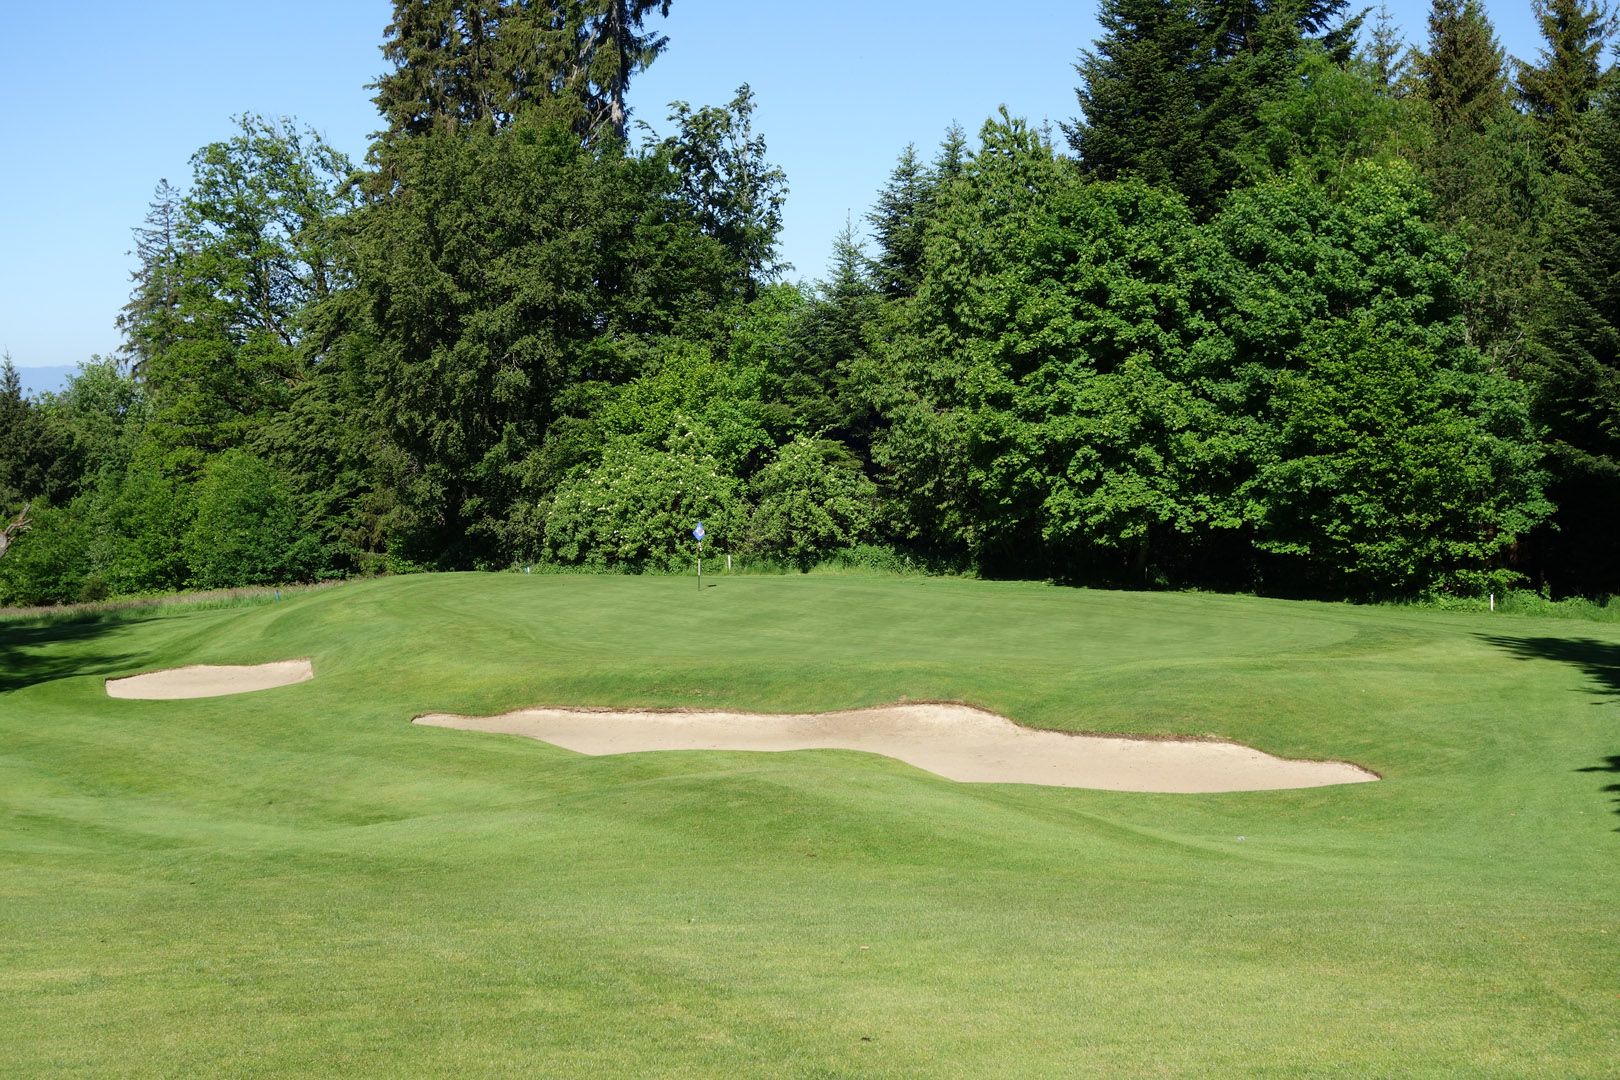
Hole n°11 - Distances
Hole PAR HCP White Yellow Blue Red Orange 11 3 18 134 126 114 109 109 Hole n°11 - Infography
-
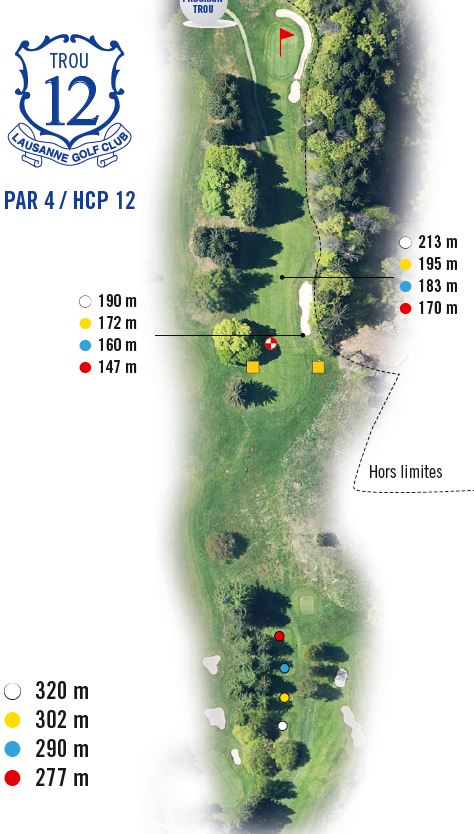
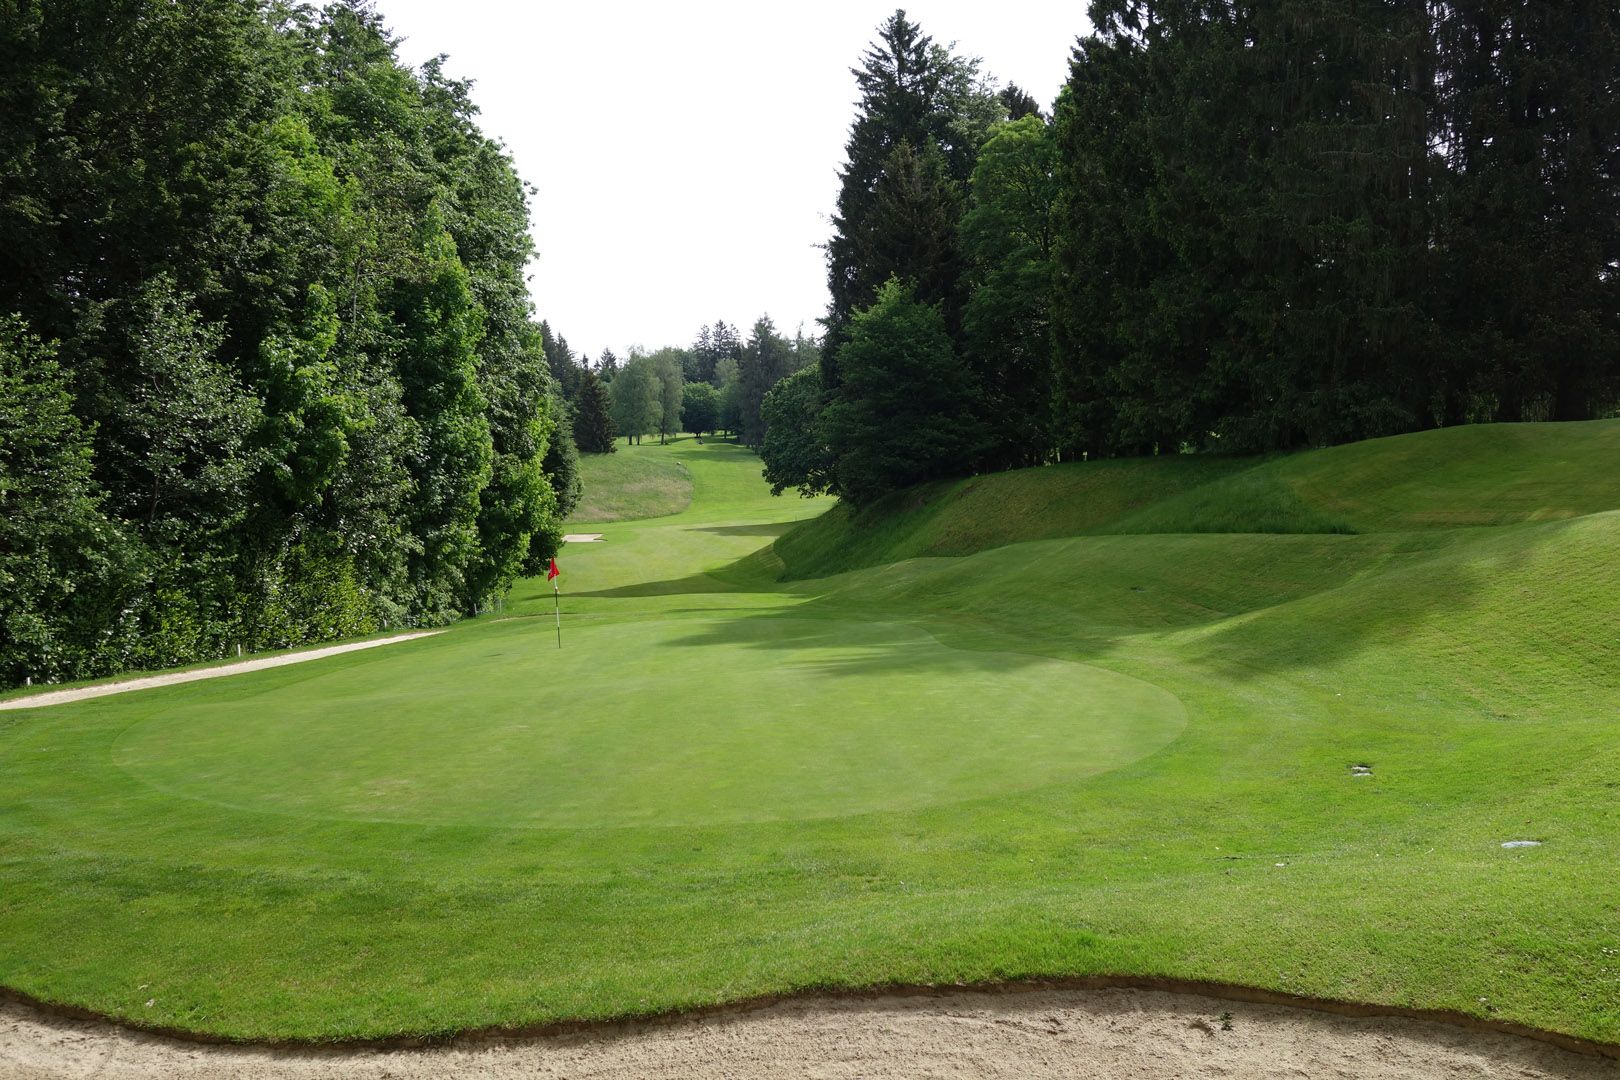
Hole n°12 - Distances
Hole PAR HCP White Yellow Blue Red Orange 12 4 12 320 302 290 277 277 Hole n°12 - Infography
-
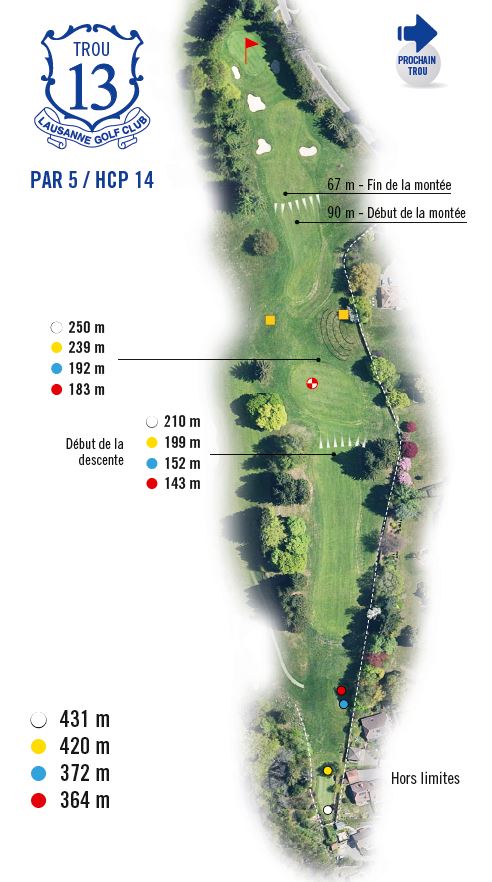
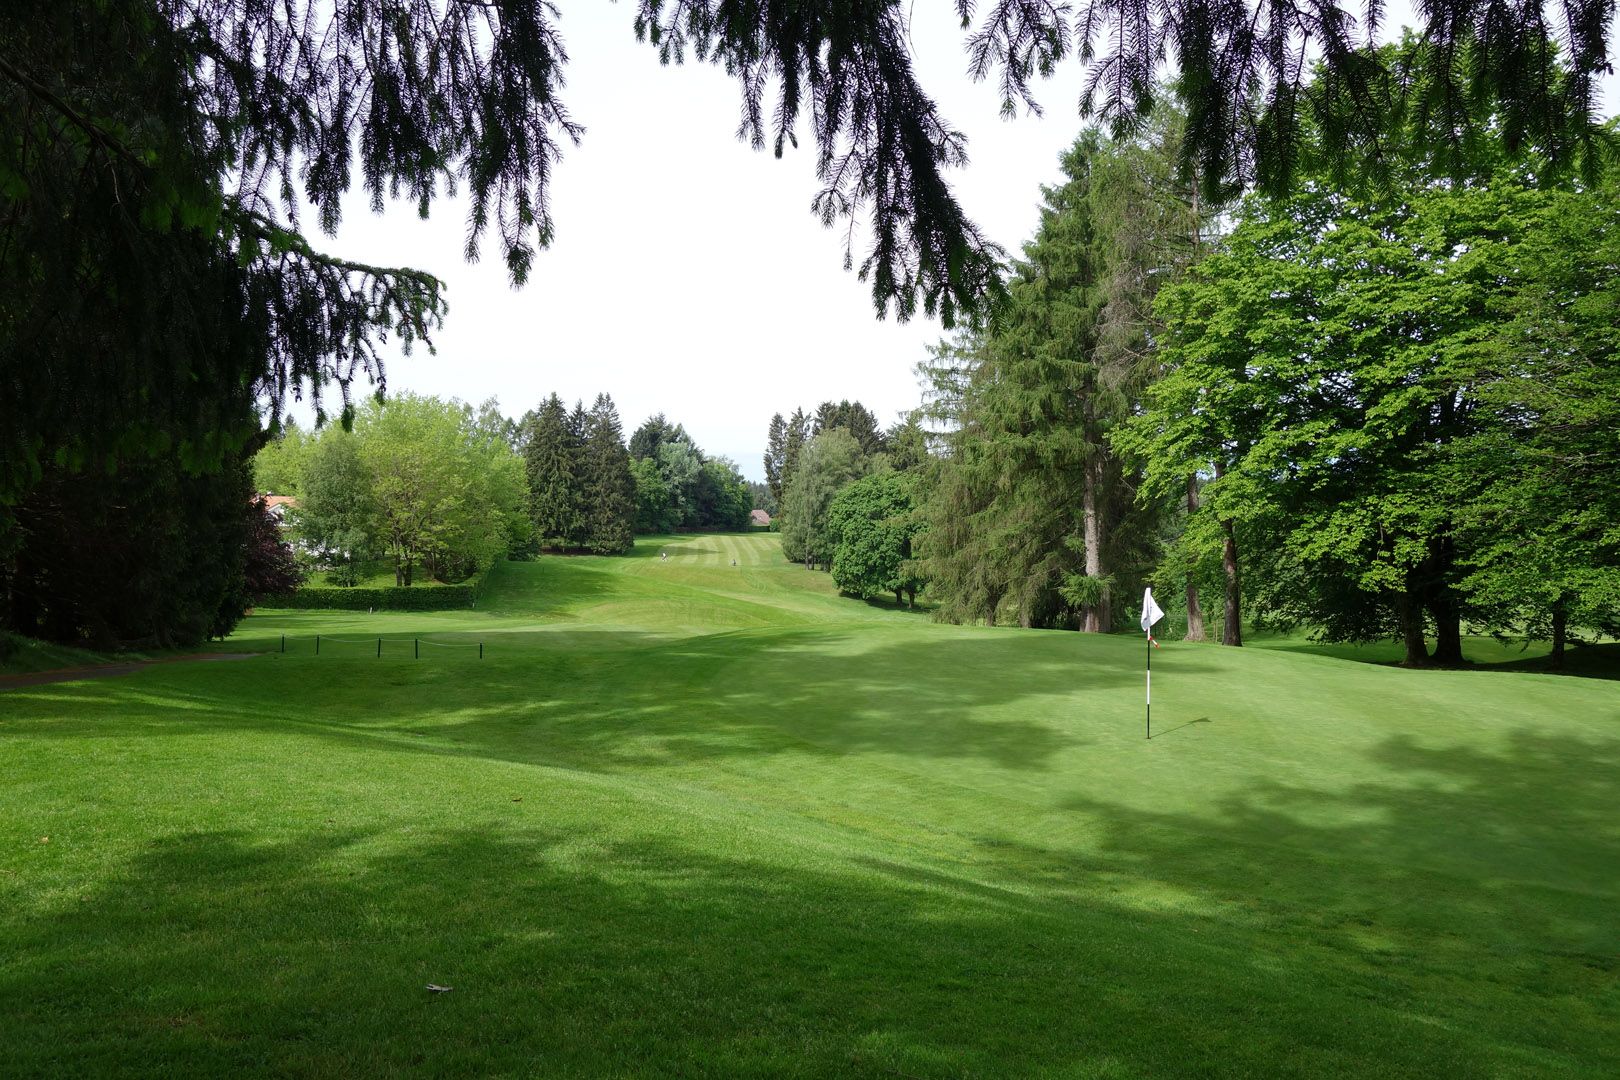
Hole n°13 - Distances
Hole PAR HCP White Yellow Blue Red Orange 13 5 14 431 420 372 364 364 Hole n°13 - Infography
-
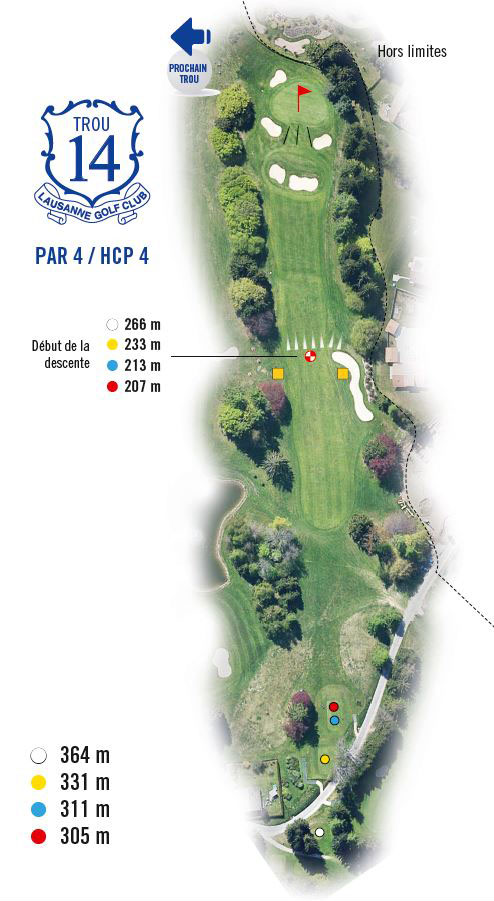
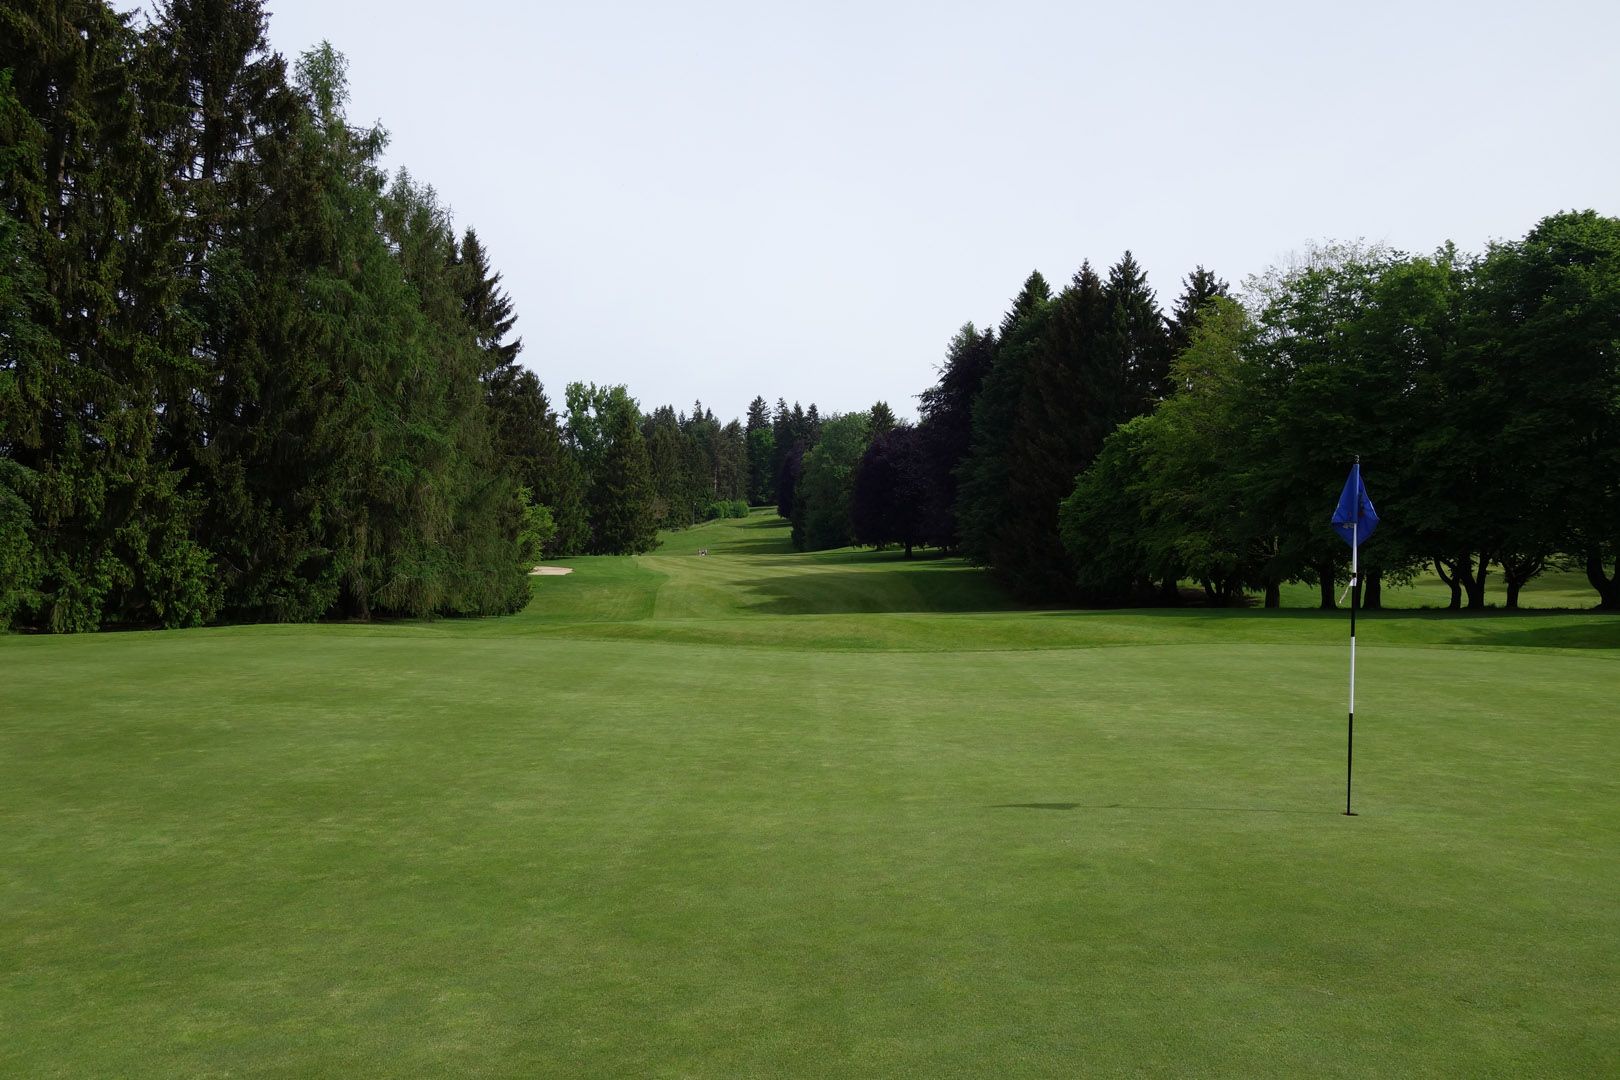
Hole n°14 - Distances
Hole PAR HCP White Yellow Blue Red Orange 14 4 4 364 331 311 305 305 Hole n°14 - Infography
-
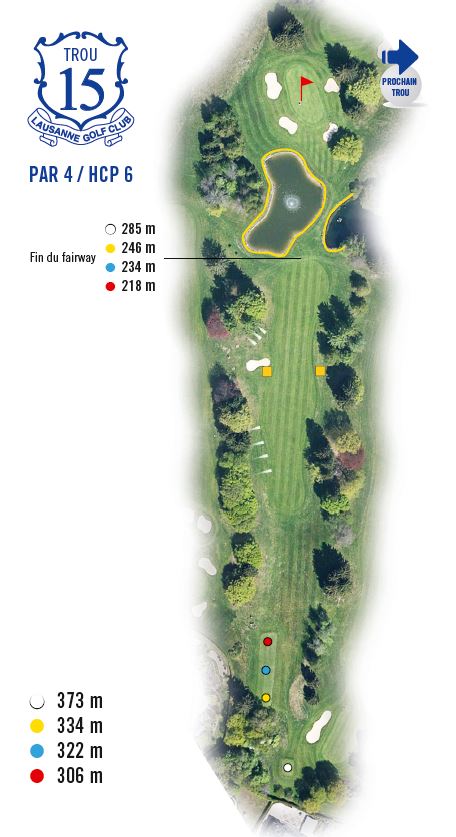
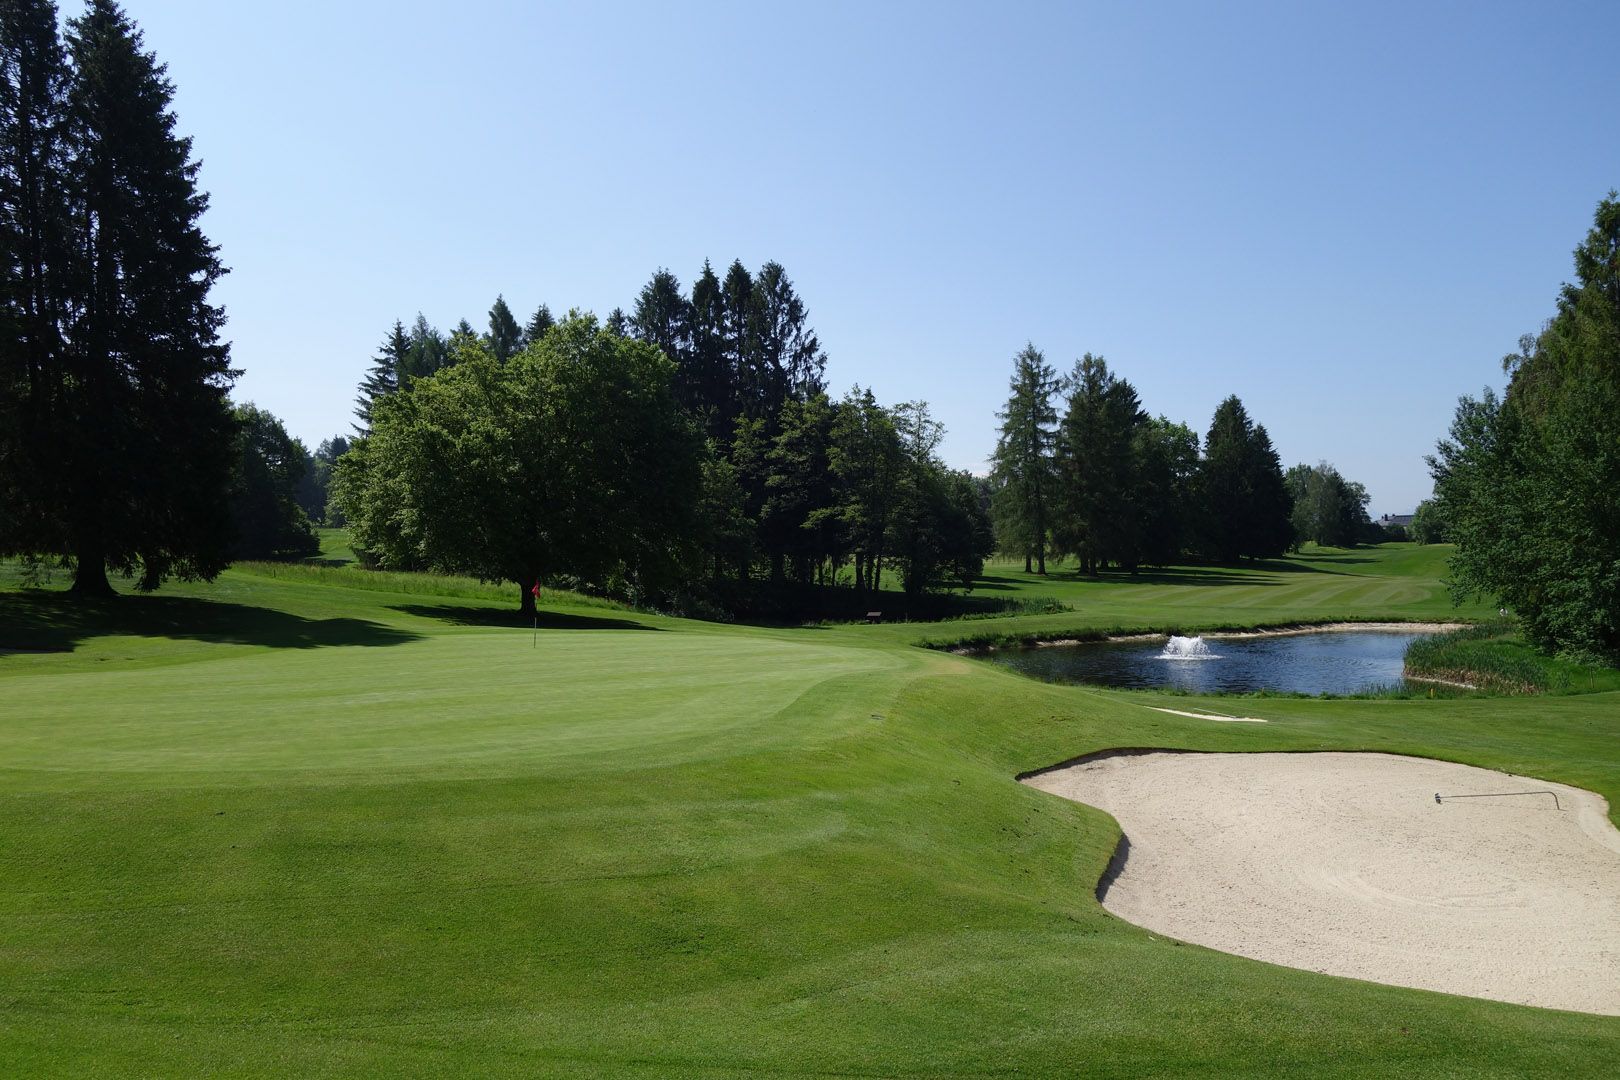
Hole n°15 - Distances
Hole PAR HCP White Yellow Blue Red Orange 15 4 6 373 334 322 306 306 Hole n°15 - Infography
-
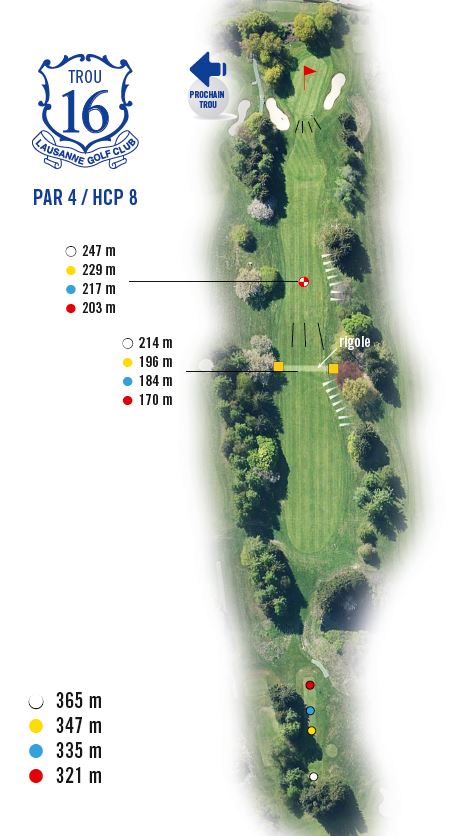
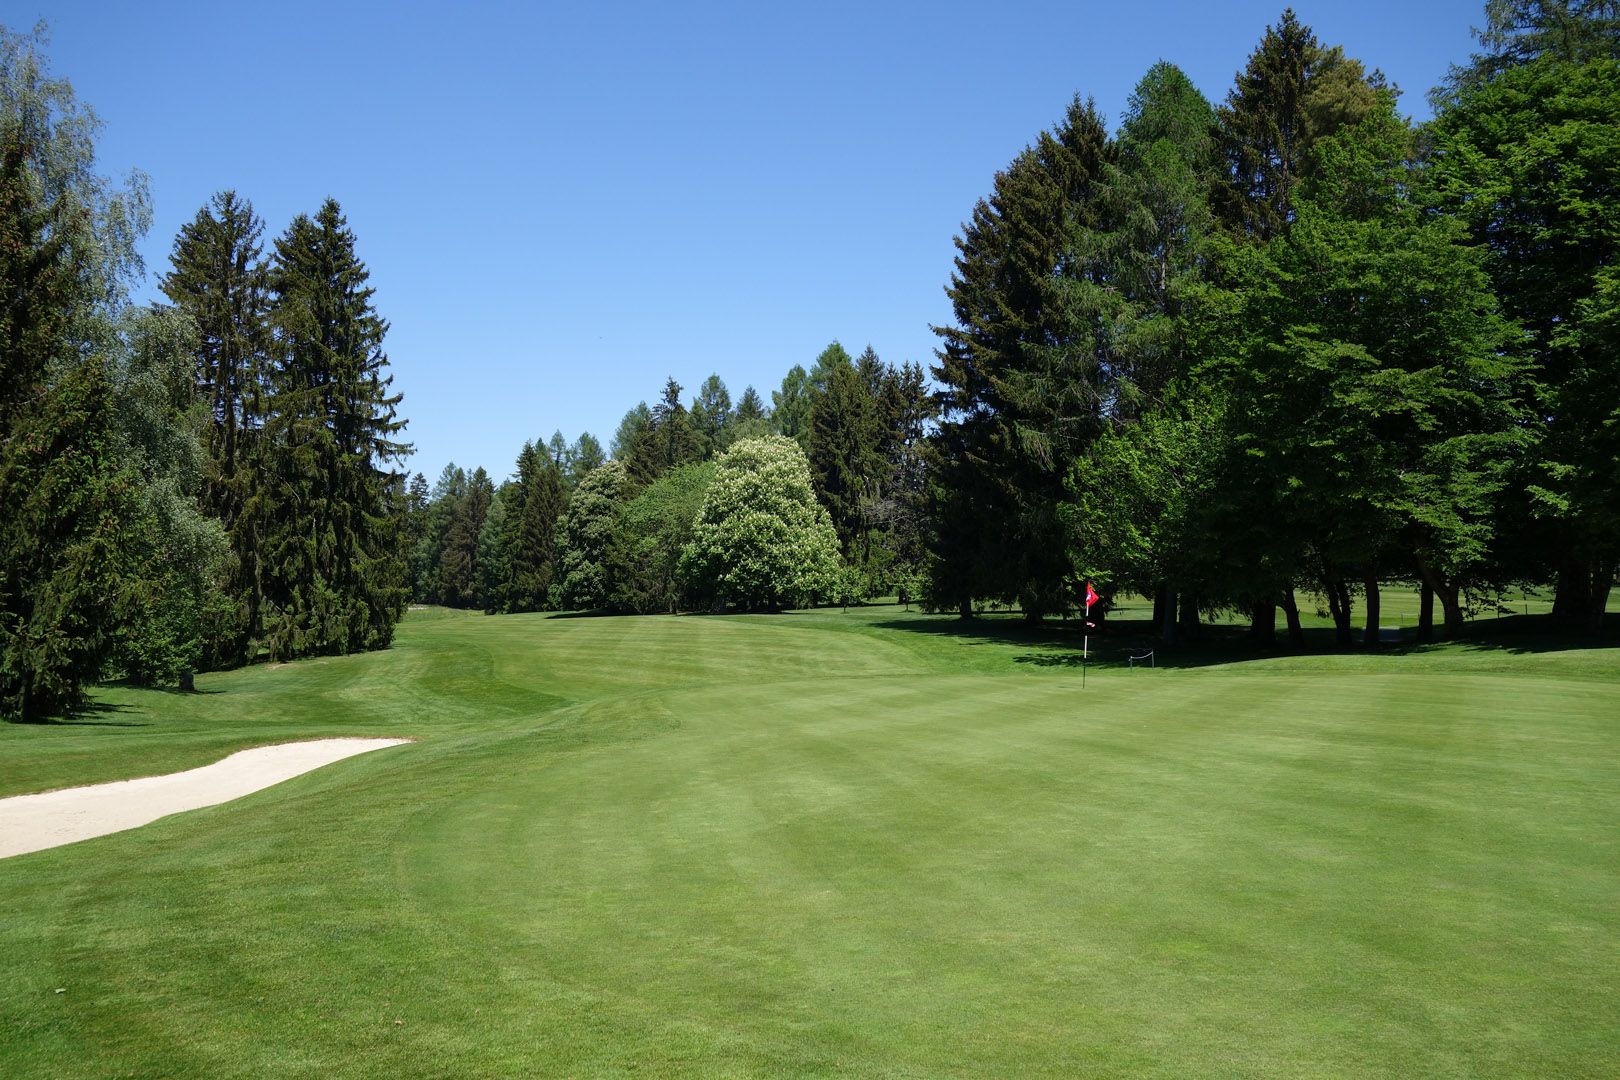
Hole n°16 - Distances
Hole PAR HCP White Yellow Blue Red Orange 16 4 8 365 347 335 321 230 Hole n°16 - Infography
-
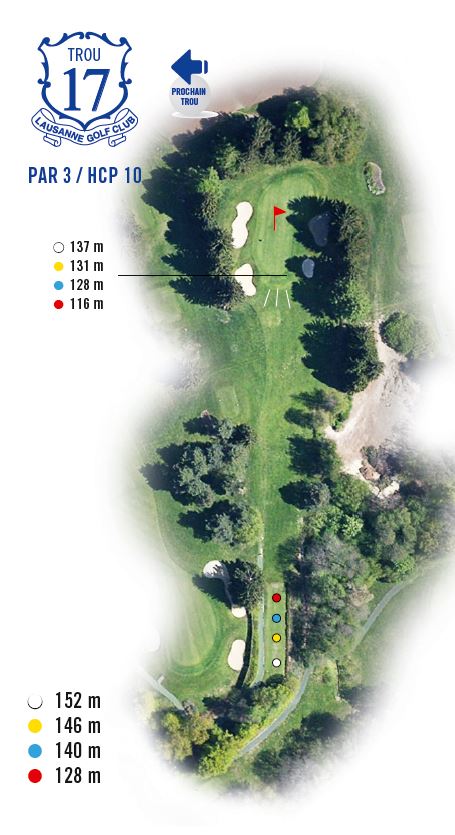
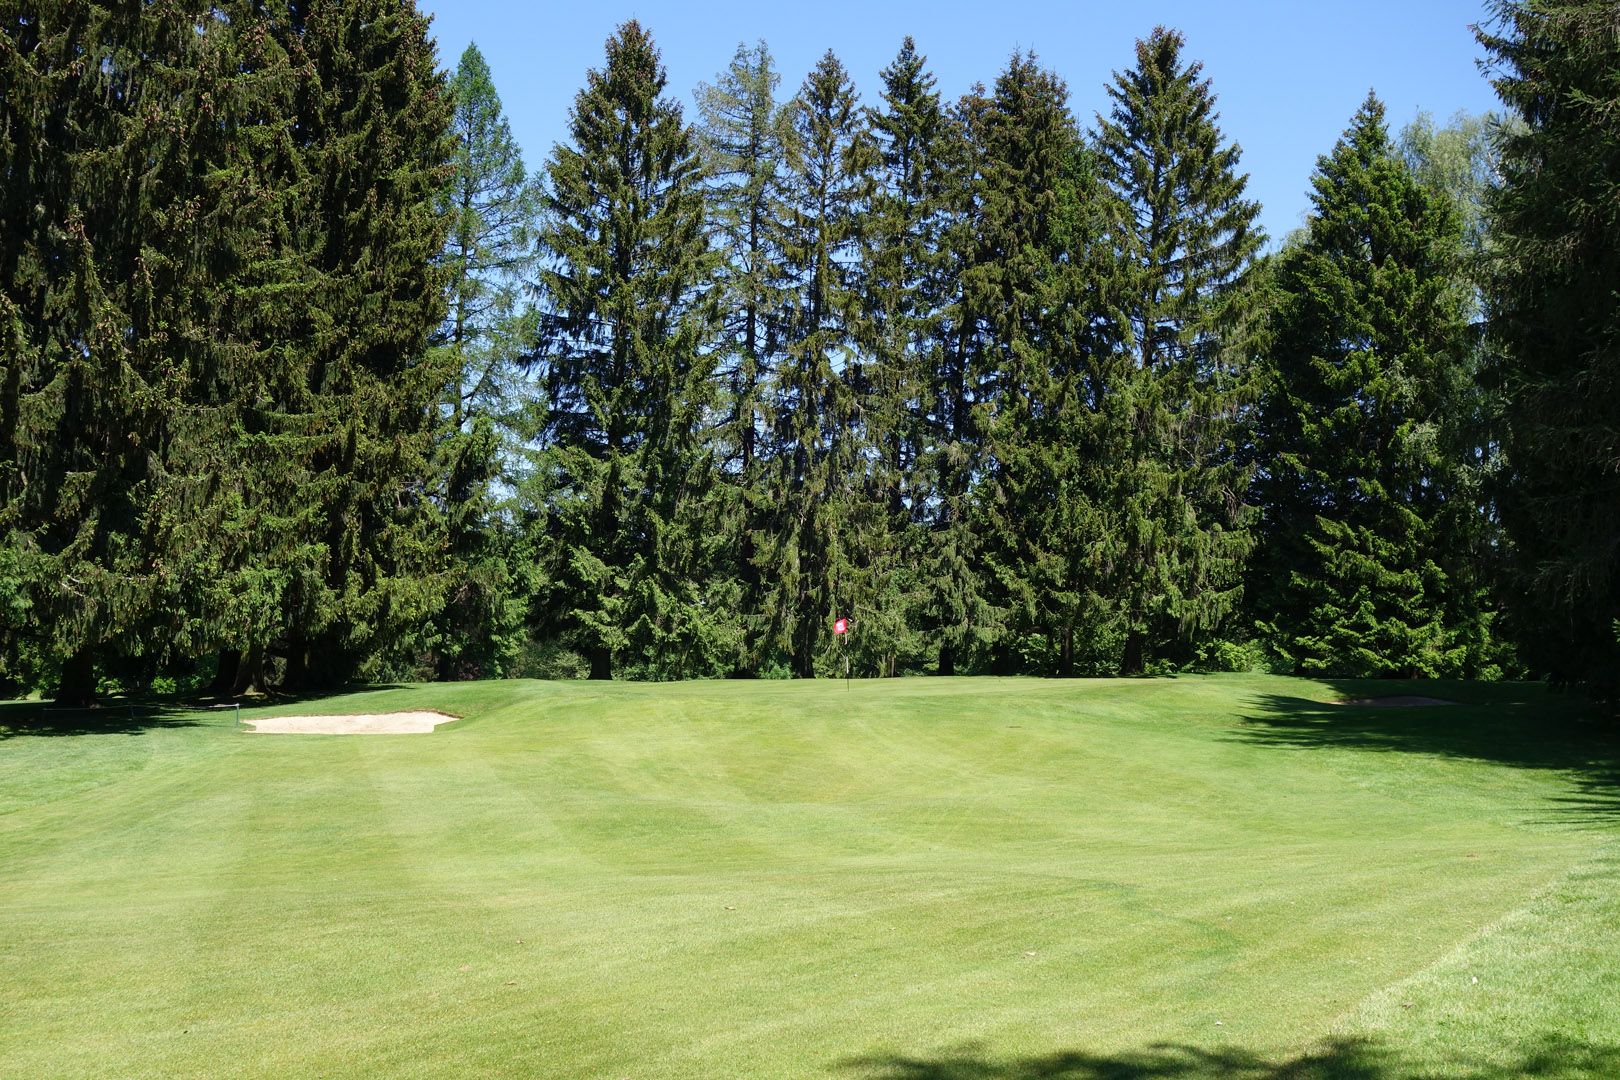
Hole n°17 - Distances
Hole PAR HCP White Yellow Blue Red Orange 17 3 10 152 146 140 128 128 Hole n°17 - Infography
-
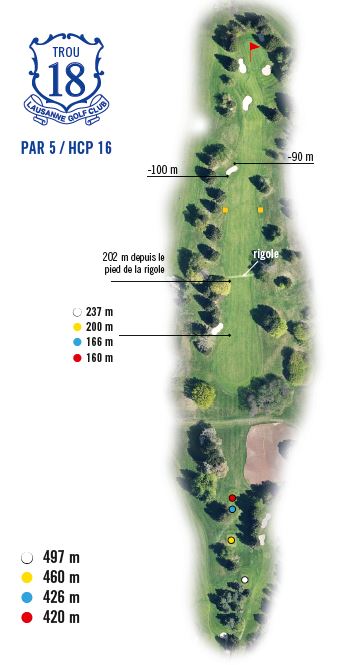
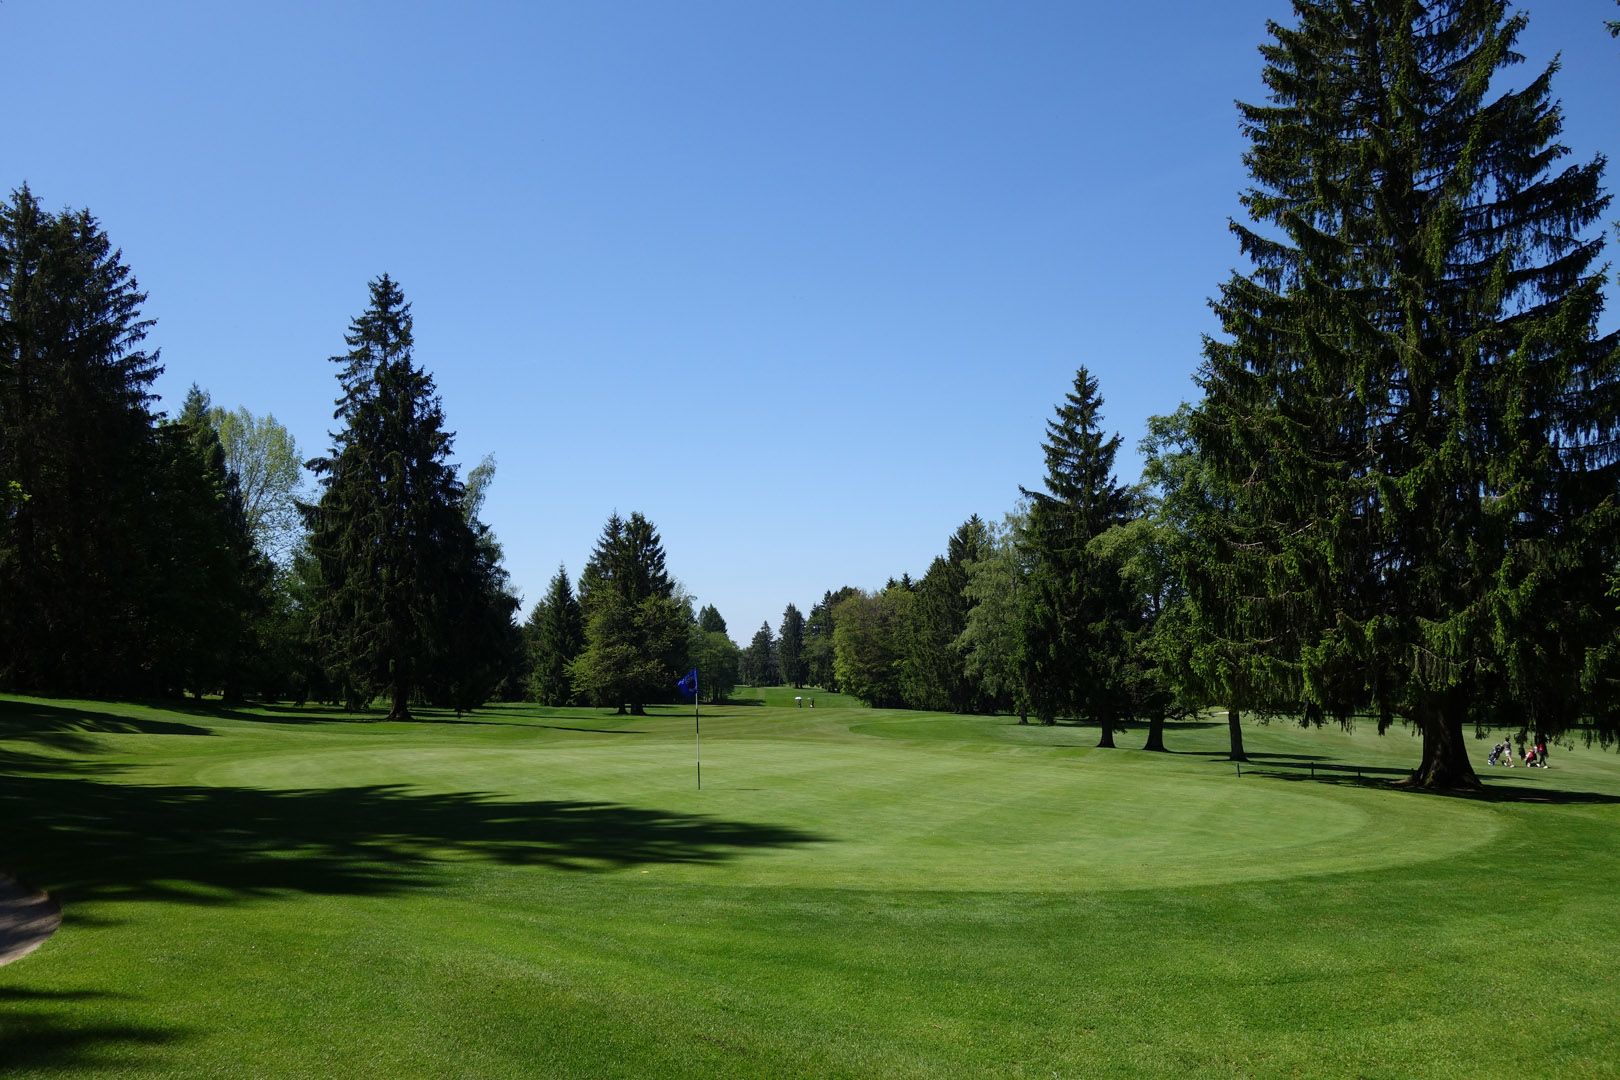
Hole n°18 - Distances
Hole PAR HCP White Yellow Blue Red Orange 18 5 16 497 460 426 420 339 Hole n°18 - Infography
Parcours - Video
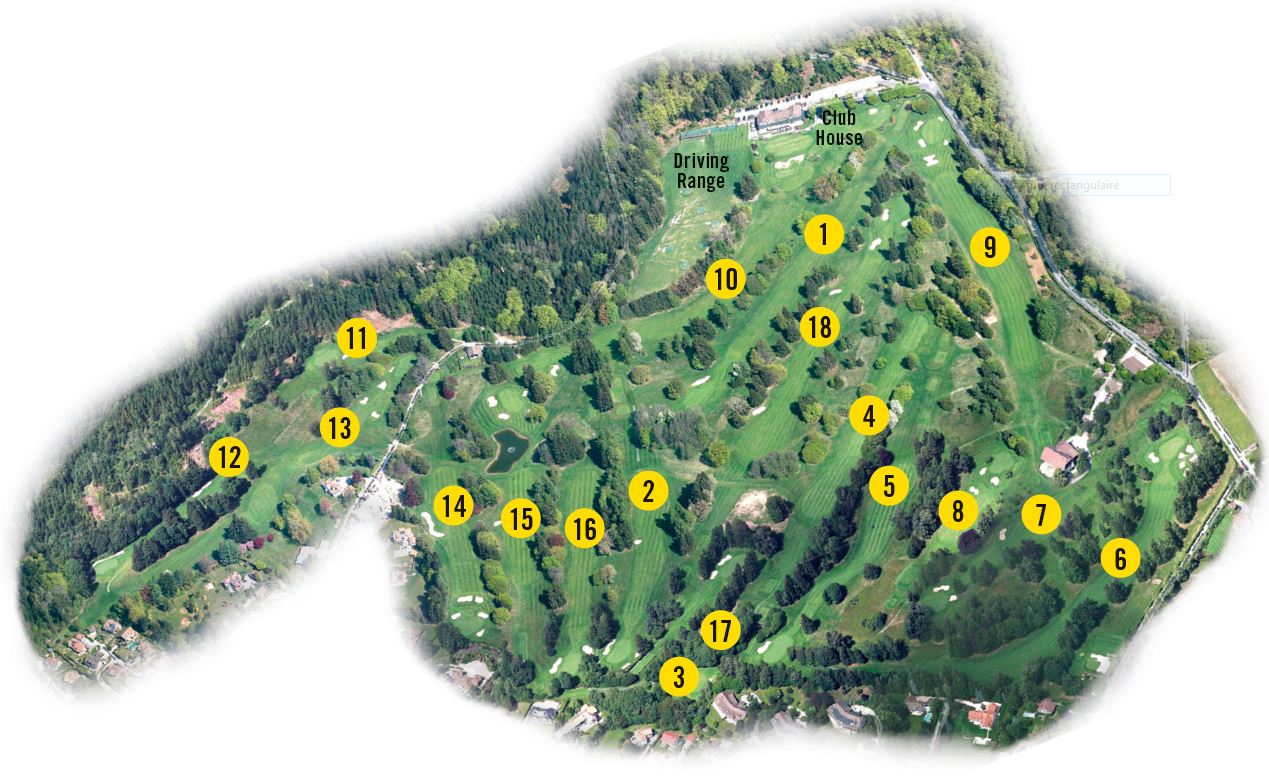
Course map